The final all day event for 2012

Here are the dates for 2012 Experience days that Sharon & myself have organised.

Now Booking

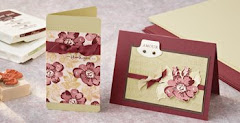
Saturday 1st December at Hethersett Village Hall for the last all day event of 2012 & a Christmas Card & gift event
Theme - A whole day crafting
Cost - £25

Future Dates:


Saturday 1st December ~ Christmas gift event

And don't forget for every event you attend you will receive a FREE raffle ticket which could win you a
BIG SHOT BUNDLE.

(Draw to take place during December's Event)

All DAYS HAVE VERY LIMITED PLACES SO BOOK NOW TO AVOID DISAPPOINTMENT. YOUR PLACE IS ONLY SECURED ONCE PAYMENT IS RECEIVED.


Do you fancy a catalogue party?

Did you know that you can qualify for hostess benefits without having to hold a party?

Just by showing your catalogue around to your family, friends or craft group, If you collect together orders totalling over £150 you will qualify for a free hostess benefits.

If your interested please contact me for further details.

Search This Blog

Contact me

Stampin' Up Contact details I have set these business hours to preserve my home / work life balance.

Email ~ Anytime ~ lovellsinnorfolk@hotmail.co.uk
Or call me between 9.30 Am ~ 8Pm ~ 07092984580


Friday, 30 September 2011

Have you discovered Pinterest yet?

As many of you know about 4 weeks ago I ceased using Facebook, I do check for private messages each day as I know that many of you contact me through Facebook messaging.
I am amazed at how much more free time I have now i'm not playing Facebook games, worrying about the games others are playing or lurking in the background of peoples lives, most of whom if i'm truthful I would probably cross the street to avoid. That doesn't mean all of my facebook friends, because if you can still see me on facebook, thats because I choose to have you there, when I became disenchanted with FB I removed all of the insignificants in my virtual world.
I've strayed from the point a little but I was wondering where all my mojo had gone, why I was so tired and most importantly why I was allowing all of the negativity that Facebook breeds into my everyday life.
Since I have broken the addiction I have spent more time in my craft room creating, more time interacting with my family, my mood has improved so much, I even sit on the sofa every evening and watch at least on WHOLE television programme, which if you know me you'll know to be a major achievement. The tiredness hasn't improved but I do still manage to cram a lot into my day.
I do still use the internet for blogging....obviously and for searching for inspiration which is how I came to discover Pinterest.
Pinterest is an online pinboard that you can categorise and add any pictues that you find whilst surfing or blogging. The bonus is that it also references the source of inspiration, which is very important if you are going to use that source for inspiration and reproduce for blogging purposes, it's always lovely when people credit me for inspiring them.
Check out my Pinterest here http://pinterest.com/lavenderstamper/

Let me know what you think of pinterest or if you would like me to send you an invite.


- Posted using BlogPress from my iPad

Location:Norwich

Stampers group cards from September

This month I demonstrated the same cards at both of my stampers group, I usually demo two different sets of cards, I dont know why! But this month I introduced a new technique and a card suitable for the men in your life.
The new technique was a faux pearl background. The camera doesn't do this project justice as you cant really see how the pearl effect glistens.


To make the faux pearl background you need glossy white card 106555
* Using the direct to paper technique completely cover the glossier side of the card with ink, I used blushing bride ink. Dont worry if you cannot get completely even coverage or finger marks this wont show.
* Using shimmer paint, pour a small amount of frost white shimmer white paint onto a palette, I use a pringle lid.
* The next part is the easy and fun part. Screw up a food bag or a piece of cling film, then dip it into the paint and dab onto the glossy card until completely covered, dab and carry on until you get a mattled effect.
* Set aside to dry, when completely dry polish with some kitchen roll.

For this project I also used one of my favourite stamp sets Vintage vogue 117690 and the co-ordinating wheel Very vintage 117693.

The colours used are Crumb cake, Perfect plum, Blushing bride, Certainly celery & Very vanilla.
I've accesorised the card with Basic pearls, Clear rhinestone brads and Pretty in pink 3mm taffeta ribbon.

I love this background technique and I am now going to try it with some other colours maybe Cherry cobbler or Old olive for Christmas.

The second card that we did was relatively simple but I think that it's so effective.


The embellishment panel is made using the Nature walk stamp set 121925, the image was coloured with Stampin' write pens Garden Green and Pumpkin Pie. Using the colour spritzer tool and the Soft Suede stampin' write pen to add the speckled effect.
Using the Soft suede ink pad & sponge daubers gently edge the panel with colour to blend on the edges.
The colour combination used on this card are Night of Navy, Very Vanilla & More Mustard.
The backing papers used come from 2 Designer series paper patterns stack. Regals 117154 & Neutrals I have to say i've had the Neutrals stack 117157 for a few months and never got round to opening it up, well more fool me this is now my absolute favourite stack it is so versatile and an absolute must for Mens cards, Wedding cards and brilliant for scrapbooking as it goes with everything.


Just incase your wondering what the number is, its a specimen number that would be used for botanical / specimen reference.

Well thats all I have to share today, but check back over the weekend for some projects from the new catalogue which is available from tomorrow.

Happy crafting
Lisa

-Posted using BlogPress from my iPad

Location:Norwich,Uk

Saturday, 24 September 2011

Finally I think I may have the hang of this

Well i have managed to sucessfully blog for 3 years, I have managed to create a blog post from my iphone and now I have ventured onto the ipad and am trying my first blog post with pictures added pictures and edited them on the ipad using Photoshop express.
To be quite truthful I cannot believe just how easy the whole process is and so quick.

Well enough waffle about my new toy, despite decorating Abi's bedroom and having her chaos spilling out into my craft room I have managed to make a project to share.
Here is the mini wreath i've made. The papers are sadly sold out but I thought that the project was too cute not to share with you.


To start this project you need to make a ring from thick card, this forms the base of the wreath, rather than cover this with paper I painted it using a cream acrylic paint. Although you cant see it from the front I rolled the edge in a versamark ink pad and then sprinkled the edges with gold embossing powder that gave a lovely vintage edging.
The next step was stamping onto the ribbon, I used the basic black ink pad & the stamp a ma jig. Then stretched the ribbon across the middle of the wreath, securing with sticky strip.
The stars are cut from real red card and then stuck onto the stars cut from dsp. Using a glue pen & dazzling diamonds glitter glitter just around the edges on all but 5 stars. The remaining 5 stars were completely covered with versamark ink and sprinkled with heat & stick, heated and them completely covered with dazzling diamonds.
The whole wreath was assembled using ahot glue gun, this probably isn't necessary in a normal household without an inquisitive kitten.

Well I hope that you've enjoyed my first blog post complete with spelling mistakes from the ipad.

Posted using BlogPress from my iPad

Friday, 16 September 2011

Much excitement today

I now have another piece of technology to try and master as I took delivery of our new Ipad 2. I dont know how long it will actually take me to get the hang of using it, especially since i've had my i-phone since june and am still finding new features and new app's almost daily, i love my phone so I hope that the next blog post will be sent using my new I-pad, just dont look to closely at the spelling, its not me its the I-phone, well thats what i blame it on. Wish me luck as I go and try and fathom it out and resist playing a few games along the way.
Thank you Paul for buying the raffle tickets to win the I-pad.


- Posted using BlogPress from my iPhone

Thursday, 15 September 2011

One Sheet Wonder ~ Part 2

Well as promised two more cards using up the leftovers from the A5 One Sheet Wonder background that I made this morning.
This time I've made two A6 cards using bashful blue card stock I think these really compliments the colour palette I started with today.


Supplies for these projects
Inks
Perfect plum
Pretty in Pink
Concord crush
Rich razzleberry
Cardstock
Bashful Blue
Perfect plum
Whisper White
Concord Crush
Rich Razzleberry
Tools
Decorative Label punch
Heat Tool
Paper trimmer
1/2" Circle punch
3/4" Circle punch
1" Circle punch
1 1/4" Circle punch
1 3/8" Circle punch
Scallop Circle punch
Decorations
Dazzling Diamonds glitter
Basic Rhinestones
White Gel pen
Sticky Strip
3/8" Very Vanilla taffeta ribbon
Linen Thread
Brights Designer Buttons
Stamp Sets
Serene Snowflakes
Contempo Christmas
Four Frames ~ 2011 Mini
Curly Cute
Gifted ~ retired September 2011


One Sheet Wonder

One sheet Wonder, I wonder how many of you have heard that phrase & have wonder what exactly is that?

Well to start a one sheet wonder you need to make either an A4 or A5 sheet of backing paper which you will use for a whole project.
For this backing sheet I used the Serene Snowflakes Stamp set & four coloured ink pads In Perfect plum ( A colour I don't use enough) Pretty in Pink, Rich Razzleberry & Concord crush.

Also I decided with this project to make small cards. I worked out that from a single A4 sheet of card you can make 2 4" square cards & a single 3 1/2" x 3 1/2" Square card, so here they are.

3 1/2" x 3 1/2" Square card
A neat trick for making a glittery border is to make lines using the Sticky strip & cover it with the Dazzling diamonds glitter, This also works as a frame around a square or rectangular aperture. It does look really blingy but I cannot seem to get good light today to take a decent picture.

4" x 4" Square Card

4" x 4" Square Card

Supplies for these projects
Inks
Perfect plum
Pretty in Pink
Concord crush
Rich razzleberry
Cardstock

Perfect plum
Whisper White
Concord Crush
Rich Razzleberry
Tools
Decorative Label punch
Heat Tool
Paper trimmer
1/2" Circle punch
3/4" Circle punch
1" Circle punch
1 1/4" Circle punch
1 3/8" Circle punch
Ornament Punch
Decorations
Dazzling Diamonds glitter
Basic Rhinestones
White Gel pen
Sticky Strip
Stamp Sets
Serene Snowflakes
Contempo Christmas
Four Frames ~ 2011 Mini
Curly Cute
Gifted ~ retired September 2011

Well after making those three cards from an A5 piece of " One sheet Wonder" background I still have a few pieces left over.
I will have a go at a couple more cards this afternoon.


Wednesday, 14 September 2011

August Stampers 10 projects

Another late update, I cant believe I have nearly managed to catch up with all of my overdue blog posts.

Here are the two cards that the stampers 10 group made in August.


Supplies for this card
Cardstock
Very Vanilla
Pretty in Pink
Marina Mist
Ink
Certainly Celery
Tools
Perfect Polka dots embossing Folder
Sizzix Big Shot
Scallop Envelope Die
Round tab punch
Papers
Springtime Vintage Designer Series papers
Decoration
Pear Pizzazz Seam binding


Supplies for this card
Cardstock
Very Vanilla
Poppy Parade
So Saffron
Ink
Poppy Parade
So Saffron
Peach Parfait
Old Olive
Tools
Stamp a ma jig
Circle cutting Template ( Non Stampin' Up )

Sponge daubers
Decoration
Dazzling Diamonds glitter

Another stampers 10 card ~ Twisted Easel


Sorry I cant remember which month this is from, but I know I've not uploaded it yet.


Supplies for this card
Cardstock
Cherry Cobbler
Basic Black
Very Vanilla
Papers
Designer Series papers ~ Love Letters
Ink
Cherry Cobbler
Crumb Cake
Soft Suede
Tools
Top Note Die
Scallop Circle punch
Modern Label punch
Scallop Border punch
Sponge Daubers
Paper Piercing tool
Mat Pack
Jewellery tag punch
Decoration
Rhinestone brad
Stamps
Tiny Tags
Artistic Etchings
Notably Ornate


Well I think that's all my blog posts caught up!!

September Stampers 6 projects

Ooop's  Whilst playing catch up today I realised that I didn't post the September Stampers 6 projects, so here they are, a very diverse pair of cards.

Supplies for this card
Papers
Designer series paper stack ~ Regals patterned paper
Stamps
Nature Walk
Inks
Basic Grey
Stampin' Write pens 
Garden Green
More Mustard
Tangerine Tango
Early Espresso
Tools
Paper Piercer tool
Colour Spritzer tool
Scallop border punch
Stamp a ma jig
Clear mount blocks
Stampin' Dimensionals
Cardstock
Night of Navy
Very vanilla
More Mustard

Faux Pearl Background Technique
Supplies for this card
Cardstock
Very Vanilla
Perfect Plum
Certainly Celery
Crumb Cake
Glossy White Cardstock
Ink
Versamark
Perfect plum
Concord Crush
Blushing Bride.
Tools
Heat tool
Bird punch
Large oval punch
Modern Label punch
Fancy Flower punch
Paper Piercing tool
Sponge Dauber
Scallop Border punch
Decoration
White embossing Powder
Clear embossing powder
Basic Rhinestones
Frost White Shimmer paint
In Addition you will need 
A food bag
Something like a pringle tube lid to use as a palette

To make the Faux pearl background you will need a piece of glossy card.

  • Completely cover the glossy card with the blushing bride ink pad using a direct to paper technique, this needs to be completely covered but it doesn't matter if the colour is un-even.
  • Tip a small amount of the frost white shimmer paint onto a palette.
  • Scrunch up the food bag this will be your applicator to make the pattern.
  • Dip the food bag into the paint & apply to the pink glossy in a dabbing pattern, carry on until the pink card is covered ( but in a patchy way )
  • Leave to dry
  • Then using kitchen roll buff to a shine
  • This can be made using any colour ink pad, red & green would look great for seasonal projects.


Well that's another project uploaded what else can I find?


AU naturelle

Christmas Au Naturelle, Christmas using Crumb cake cardstock I could quite happily use the crumb cake for all of my Christmas projects, It goes with Everything.
What colours are you using this year?

Both of the cards in todays post are A6 if you have loads of cards to make this is the most economical size card to make as you get two cards from a single A4 sheet.

Supplies needed for these cards
Cardstock
Crumb cake
Very Vanilla
Early Espresso
Real Red
Ink
Soft Suede
Whisper white ( Craft )
Early Espresso
Real Red
Versamark
Stampin' Write pens
Stamps
Lovely as a tree ( I don't use this set enough )
Serene Snowflakes
Welcome Christmas
Gifted ~ retired September 2011
Tools
Stamp a ma jig
1 1/4" Square punch
1 3/8" Square punch
Heat tool
1/4" Circle punch ~ Retired
Decorations
Basic Rhinestones
Dazzling Diamonds
Heat & Stick powder.
The shimmer of this card is stunning & the photo really doesn't do it any justice.
To make the shimmer on this card I first stamped the Lovely as a tree image using Early espresso ink, using my Stamp a ma jig to make sure that the image was central as I had pre-cut the panels for this card.
Then I covered the whole panel with Versamark embossing ink using the ink pad directly onto the card.
Then sprinkled on a generous coat of heat 'n' stick powder, tipped off the excess & returned it to the pot & heated the card using the heat tool.
Quickly I covered the whole area with Dazzling diamonds whilst it was still tacky & sprinkled off the excess & carefully heated to set the glitter into the heat & stick powder.
This is a beautiful technique & works well with many images.

The Gifted Stamp set is retiring at the end of September 2011.

Tuesday, 13 September 2011

Managing to find some Mojo for Christmas ~ At last

Last week I was quite pleased with myself as I managed to make three Christmas cards in a spare hour that I had. I do have to say that they are only small cards, so don't get too excited.

The measurements of the 3 cards in this post are 4" square.
With these three cards I challenged myself to use the colour family that I seldom choose which is the Regals collection, I tend to go for the Brights since the colour renovation last October I Love the brights.

Supplies needed for these cards
Cardstock
Very Vanilla
Riding Hood Red
Early Espresso
Garden Green
Basic Black
Ink
Early Espresso
Riding Hood Red
Garden Green
Basic Black
Tools
Scallop circle punch
Stamp a ma jig
1 3/8" circle punch
Corner rounder punch
Large Oval punch
Sponge Daubers
Decorations
Basic Pearls
Basic Rhinestones
Love Letter DSP
Very Vanilla 5/8" Grosgrain Ribbon
Shimmer paint in Champagne mist used on the sponge daubers & also made into a shimmer mist using Iso-propyl alcohol.


Well i did say that they were only small cards but just by starting the Christmas cards it has given me the incentive to carry on & get prepared, especially as someone told me that there are only 15 weeks to go.

Sunday, 11 September 2011

Snip & Tuck fold card

The mini catalogue is nearly over just a couple more weeks & many of the stamp sets in the Mini catalogue will be retired, gone for ever. I have loved having the mini catalogue as it has taken me completely out of my comfort zone. I must say that the first time I saw the Mini at a training event I was like a rabbit caught in the headlights, now don't get me wrong I loved it, but many of the stamp sets were out of my comfort zone. The stamp set featured in this post Clearly for you.

Clearly for you ~ Images copyright Stampin' Up
A while back when I was struggling to find my creativity I discovered a nifty tool on Google, If you type in the name of the stamp set you want inspiration for & then click the Images link on the left hand side you get pages & pages of projects using that stamp set, WARNING this is an enjoyable but time consuming process, because when you click on an image you also get directed through to the image owners blog, I have found so many new blogs this way.
Well this is the way I found the snip & Tuck card that i cased. The blog I found the inspiration on is a fellow American demos blog. Julie has a brilliant tutorial on here showing exactly how to make the card.

Supplies needed
Cardstock
Crumb Cake
Very Vanilla
Cherry Cobbler
Inks
Basic Grey
Cherry cobbler
Stampin' Write pens
Stamp Set
Clearly for you 121911 wood mounted 121976 Clear mounted
Tools
Blender pens & pringle lid palette
Stamp a ma jig
Decorative label extra large punch 120907
1 3/4" x 7/8" Large oval punch
Scallop oval punch
Decoration
3mm Taffeta ribbon in Very Vanilla
DSP in Newsprint 117166

Many of the items included in this project will only be available until 30th September.


Saturday, 10 September 2011

Springtime Vintage pair

More from The Mini
These are some projects i have been making over the last couple of months, I have trying to find my creative mojo & seem to have spent more time blog surfing than actually creating hence the lack of blog posts.

Springtime Vintage DSP from the 2011 Mini catalogue available until 30th September  whilst stocks last
Images Copyright Stampin' Up


I had been tidying out my craft room, trying to find my mojo when I came across a file full of templates, when I found this tri-fold card template, it lent itself to the springtime vintage papers & I love the results.

Flowers die cut using the Fun Flowers Die

The Mini watering can is made from the Milk carton die.

Supplies needed for these projects
Cardstock
Certainly Celery
Very Vanilla
Pretty in Pink
Ink
Versamark
Pretty in Pink
Certainly Celery
Stamp Set
Cute By the Inch ( Hostess set 2011)
Sincere Salutations
Hopeful Thoughts
Tools
Big Shot
Beautiful Wings Embosslits
Fun flowers Die
Perfect polka dots embossing folder
Stamp a ma jig
1 3/4" oval punch
2" Oval punch
Scallop square punch
1 1/4" Square Punch
Decorations
Dazzling diamonds glitter
Springtime Vintage papers
Big designer buttons ~ Springtime Vintage
Linen Thread

Many of the products in this project are only available until 30th September.

Friday, 9 September 2011

In an attempt to get organised

I really do need to get organised, The craft room is a mess & I have barely set foot in there all summer, I have made No Christmas cards or projects, that is un-heard of. Dan went back to University on Monday we took him up to Nottingham to get ready for year 2 of his Computer Science degree, he has a very busy year ahead of him as not only will he be studying, she says hopefully, he is also president of the gaming society & now he has just found out he has got a place on the student ambassadors scheme. Well done Dan & good luck for Year 2.

I cant blame Dan for my lack of organisation, it has been a weird summer, I think the season we just had was summer, though Despite waking up full of hope for a beautiful day that would make everyone smiley & happy it never really materialised, I know we did have two nice days in April as one of them was my Birthday which I spent on Southwold beach eating Fish & Chips.

So in the hope that the next 3 months will be a little more organised I made this, so far I've only made one, but I think I could do with one in every room of the house if I am going to crack this organisation thing.

I love the bright colours from the Designer series paper patterns stack
Supplies needed for this project
Papers
Designer Series patterned paper stack ~ Brights
Cardstock
Thick Grey board, this is not a Stampin' Up product unless you count taking the back off your grid paper pad. This need to measure 6" x 8"
Whisper White 
Tangerine Tango
Concord Crush
Ink
Concord Crush
Stamps
Just Perfect Alphabet
Tools
Flower, Daises#2 Dies
Sizzix Big Shot
3/4" Circle Punch
1" Circle Punch
Decorations
Dazzling Diamonds
1/2" Stitched Poly Ribbon in Concord Crush
Non Stampin' Up products
1 x Pencil for covering 
I x wooden peg ( now you know why I scoured Bury for wooden pegs Sharon )
Hot glue Gun ( for attaching the peg )
1x Small lined note pad from £1 shop


So do you think this is the start of me being super organised? Answers on a postcard.........................

If you are interested in the Designer Series Paper patterns stacks her are the options currently available. A new set of in-colours will be added to the range from 1st October 2011
The stack contains 40 sheets of double sided designs 2 of each design in each colour way.
Available in 12" x 12"
Brights 117155 £15.50 
Subtles 117152 £15.50
Regals 117154 £15.50

Neutrals 117157 £15.50
I have had the neutrals stack for a few months now & only just opened it last week & it is fabulous I have really been missing out by not using this stack.

2011 In Colours 117158 £15.50
These are an absolute bargain at £15.50 for 40 double sided sheets it works out at just 39pence per sheet.

Thursday, 8 September 2011

Stampers 6 project from August


Inside flap of the box has a greeting, but you could also put an image here if you prefer.

I have been such a bad blogger this summer, todays post is the August project from my Stampers 6 / 7 group that I have only just got round to photographing & editing.
The summer has been very strange for lots of reasons.

  • Abi went on Study leave in May & went on to take her GCSE's
  • June our middle son got married
  • June Dan came home from his first year at University & bought bags & bags of belongings that wouldn't fit into storage.
  • At work we lost both of our weekend staff, but to safeguard jobs neither were replaced immediately, leaving the existing staff to cover both Saturdays & Sundays, which is something that I seldom had to do previously, so extra hours & commitments ate into my spare time.
  • Two litters of beautiful kittens the first litter had two kittens & the second litter had four kittens, one of which we kept as one of my big cats went missing 15 weeks ago.
  • I also re-discovered my love of baking, well cupcakes & cake pop's but i'll save that story for another day.
I realised something last Tuesday after we had taken Dan back to Nottingham & Abi had started 6th Form that I hadn't spent a day at home on my own since early May, I don't mind my own company it gives me quiet time to be creative. Usually I start Christmas projects in July but this year I am very much later.

So to kick start Christmas I made this delightful little matchbox card & matching gift card. I thought that you could use these as Table favours or as little gift boxes containing Chocolates, Mini soaps or even a pandorra charm.
I have used the set Contempo Christmas & the Elegance wheel ( Which isn't strictly Christmas but thats exactly what I love about Stampin' Up & being creative )
Contempo Christmas 118734 wood mounted 120594 Clear mounted


Supplies needed to make this card
3" x 12" whisper white card
Scored at 3" , 4", 7", 8" & 11"


The areas coloured red are the areas that need to be decorated  before assembly
4 7/8" x 4 7/8" Whisper white square
Scored at 1" in from the edge on all four sides, this makes the drawer to slide inside the box.

2" x2" Whisper white
2 1/4" x 2 1/4" co-ordinating card stock
Scraps of co-ordinating card stock & DSP to decorate.

Tools
Tombow glue
Mini bulldog clips ( available from good stationers )
Stamp a ma jig
1/2" circle punch
Ornament punch
1 3/8" Circle punch
Word Window punch
Paper Piercer
Stamps
Contempo Christmas
Ink
Old Olive or Wild Wasabi
Real Red or Cherry Cobbler
Decorations
Dazzling diamonds
Basic Rhinestones
Jolly Holiday DSP

This is the first of my Christmas projects for 2011, so keep checking back over the coming weeks while I catch up with all of my Christmas preparations.


Related Posts Widget for Blogs by LinkWithin

Stampin' Techniques

Stampin' Techniques
Two step Stampin

Watercolouring

Masking

Markers

Rock n roll

Stampin' Pastels

Heat embossing

Crafts are here

Crafts are here, crafts are there,

My craft supplies are everywhere.

I really should clean this mess,

but I like it I confess.

Floor is littered, chairs are piled,

Kitchen's looking pretty wild.

On the table, counter too,

Seems that any place will do.

Hall is stacked with cartons high,

filled with things folks like to buy.

Garage is full, but so far....

there's still room to park the car.

I never have an idle day,

New ideas come my way.

Don't know yet what I'll create,

but my imagination's great.

My family smiles, they don't complain,

although at times I am a pain.

but when all is said and done,

I really am a crafty one!

I"ve been visited

link to free hit counter html code
Visit the hit counters gallery.

Guest book

NeoCounter