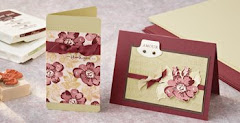
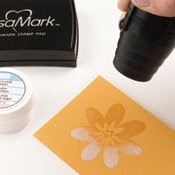
The final all day event for 2012

Here are the dates for 2012 Experience days that Sharon & myself have organised.

Now Booking

Saturday 1st December at Hethersett Village Hall for the last all day event of 2012 & a Christmas Card & gift event
Theme - A whole day crafting
Cost - £25

Future Dates:


Saturday 1st December ~ Christmas gift event

And don't forget for every event you attend you will receive a FREE raffle ticket which could win you a
BIG SHOT BUNDLE.

(Draw to take place during December's Event)

All DAYS HAVE VERY LIMITED PLACES SO BOOK NOW TO AVOID DISAPPOINTMENT. YOUR PLACE IS ONLY SECURED ONCE PAYMENT IS RECEIVED.


Do you fancy a catalogue party?

Did you know that you can qualify for hostess benefits without having to hold a party?

Just by showing your catalogue around to your family, friends or craft group, If you collect together orders totalling over £150 you will qualify for a free hostess benefits.

If your interested please contact me for further details.

Search This Blog

Contact me

Stampin' Up Contact details I have set these business hours to preserve my home / work life balance.

Email ~ Anytime ~ lovellsinnorfolk@hotmail.co.uk
Or call me between 9.30 Am ~ 8Pm ~ 07092984580


Showing posts with label Mini Book. Show all posts

Friday, 6 July 2012

Christmas Training ~ Day 5

Closed Album ready for posting
You must be feeling a little in the mood to start your Christmas Cards & projects.
Well here we are on Day 5 with one of my favourite projects of the day the fold out mini album, this would make a great Christmas card with a few family photo's added as a keepsake for a family member.
Close up of the decorative panel

Album folded out awaiting the addition of photographs on the pull out panels.
Cardstock
Pear Pizzazz
Whisper White
Riding Hood Red
Brushed Gold
Baja Breeze
Inks
None this is a stamp free project, but you could use a stamp set to decorate the white envelopes
Stamps
None this is a stamp free project, but you could use a stamp et to decarate the white envelopes
Tools
Framelits ~ labels
Boho Blossom Punch
Sizzix ~ Timeless type Junior Alphabet
Simply Scored Board
Non Stampin' Up
Water spray
Kitchen Roll
C6 White Envelopes
Cheap Hairspray ( For setting the colour on the Basic Rhinestones )
Self Adhesive Velcro dot
Embellishments
Basic Rhinestones
Bakers Twine ~ Lucky Limeade
Pleated Stain Ribbon ~ Riding Hood Red

What a great idea as a keepsake & as the papers are not Christmassy this could be used at anytime of the year. 
Another idea would be as a thank you card for wedding gifts with a couple of wedding pictures inside.


Tuesday, 14 December 2010

Pull-Out Scrapbook

A Recent make & take project.


To Make the Pull out Scrapbook you will need


  • Two 4” x 4” chipboard coasters

  • One 4” x 10” piece of card stock for the front book cover

  • One 4” x 10” piece of coordinating patterned paper for the inside of the book cover

  • Two 3” x 12” pieces of cardstock

  • Three pieces of ribbon – 18” each piece

  • Extra sticky adhesive

  • Paper cutter

  • Scoring tool

  • Grid paper (optional but helpful)

  • 3/16” corner rounder


Step 1

Use the 3/16” corner rounder to round all four corners of two pieces of 4” x 10” pieces of paper

Run a strip of
 tape lengthwise through the center of the plain 4” x 10” piece of card stock and adhere one of the lengths of ribbonto the tape.

Step 2

Adhere two chipboard coasters onto the outer edges of the prepared piece from Step 1. 

Apply adhesive between the two coasters so that the patterned paper will be adhered along the spine of the book.

Step 3

To create the inside cover of the book, adhere second piece of 4” x 10” piece of patterned paper on top of the coasters. 


Its at this stage you can ink the edges of the cover if desired for a vintage look.


Step 4

Score both pieces of 3” x 12” card stock at 3”, 6” & 9”. 

Adhere the two remaining pieces of ribbon in center of the farthest right hand panel of the 3” x 12” card stock, 


Its at this stage you can ink the edges of the pull out pages if desired for a vintage look.

Step 5

Adhere one of the 3” x 12” pieces of card stock to each side of the inside cover to create the “pull out” sleeves of the project


Step 6

When both pull out sleeves are taped down, it will look like this.

Step 7

This is what the inside of the book will look like when the ribbons have been tied.

Step 8

Decorate the inside pages.

Step 9

Decorate the front of your scrapbook.


If you Make an album like this don't forget to send me a link to look at the finished pictures.


Monday, 15 November 2010

Scrapbook House

Finally I have arrived in my craft room.


What a busy week last week was with viewing 6th forms & work I don't think I sat down until Thursday. I don't think that it helped as I had a major blitz of the craft room, airing cupboard & then decided I needed a bedside table!!! Simple enough request you may think, but not in this house. We have been living in our house now for 5 years  & we are slowly getting the house how we want it. I must confess to hating the house for the first 18 months that we lived here. It was a newly built house and week after week we had builders in & out with there trusty mastic guns to fix the ever lengthening faults list, well I digress. Two years ago following up on a census our house was chosen to be surveyed by a government surveyor, where we found out that although we have 4 bedrooms, my craft room is not large enough if we wanted to let it out as a bedroom & our room is only 1" over the legal measurements for a double bedroom. Can you see the problem here? With fitted wardrobes the only option & they had to have folding doors, we are extremely challenged for space. So yesterday DH thought he would move the bedroom around into the only other position it would fit so I could have a bedside table. Well he managed it & now I have space for a bedside table, although it will have to be a small one.
So all week I have been full of inspiration but I have only just made it into the craft room


Whilst I was away at the recent Stampin' Up convention I was very fortunate to see some very inspiring demonstrators on the main stage, one of these was a fellow UK demo called Michelle Last, Her blog is wonderful so pop over and see some of her creations.


My Inspiration


One of the projects that Michelle shared with us was the mini scrapbook houses using this template


Roof panel measures 14cm x 9cm


For my house I have used the card stock & the papers from the Simply scrappin' Christmas Jingle kit & have made a little house to give as a Christmas card, inside the roof panel I've stamped a greeting from the occasional greetings stamp set, I will also use this to write my message.


Just a note, it is easier to stick your ribbon onto the base card layer before covering both sides with the designer series papers, it is much stronger & tidier.


Ready to decorate with some pictures of our Christmas preparations
If you pop over to Michelle's blog you can see that she has made them for a variety of different occasions & they are all equally as lovely


This will be one of the projects that I am making with  my stampers 10 & Stampers 6 groups on our optional December meeting.
There are two sessions Monday 6th December at 7pm & Thursday 9th December at 7pm.
be sure to let me know which session you would like to attend.


All of the product used in this project is available from Stampin' Up & can be purchased through me as an independent creative coach.


Sunday, 9 May 2010

Crop day

Saturday was a bit different as I was invited to a new crop, well it's been going a while but i've never been before.


Looking up the hall to the gallery.
It was in a really lovely old barn on a place called Horstead.


Abi & Angie scrapbooking, looking down the hall from the gallery.

Looking down from the gallery

Abi & Angie Scrapping & eating sweets

It ran from 10 ~ 4 so I actually managed to get a couple of projects nearly completed.
here is the first one its a flip flop book from a 12" x 12" piece of Stampin' Up Kraft card.


Cut the 12 x 12 card into three strips measuring 4" x 12"


Score all three strips in 3" from each end, so your panels are 3" ~ 6" ~ 3"
Crease all of the folds well, when they fold too the centre if the ends overlap trim them with a knife & metal ruler or guillotine so there is a tiny gap.


Then put two pieces together and using a wet glue stick the two 3" panels together & hold for a minute to make sure they wont move whilst drying.


Repeat at the opposite end an stick the two 3" panels together, when the book is dry fold all thel flaps over until your left with the folded book in the first picture, then using a ruler and scoring tool score 1cm in from the spine on what you want to be your front cover, this allows room in the spine for the pages to expand & embellishments to be added.
With my book I added papers and inked all of the edges as I am very much into the vintage look from inking at the moment.
The new Vintage vogue stamp set looks lovely with the flowers matted to make vintaged paper flower embellishments.
I will add another picture as soon as the book is finished.


Kraft card is available from Stampin' Up & is available to purchase through me.

Sunday, 14 February 2010

Paper bag scrapbooks

A while ago I was given an undecorated paper bag album to create, I was very new to scrapbooking when Alsion gave me this to decorate & until I had seen some other examples online I was a bit confused as to what I was supposed to do with it.
I managed to source the flat bottom paper bags, which were amazingly hard to find, whilst i'm sure that many of our american cousins throw them away on daily basis these bags are like gold dust.

This is the album I made for Paul, it is just awaiting the photo's and finishing touches.


The tabs are on the edge of pages that slip into the open ends of the bags.

Hard to believe that this mini book started life as a plain old paper bag.

Making paper bag books is really quite easy. Using 3 lunch bags, stagger them so that the open flap falls to the right, then to the left, then to the right again. Lay them one on top of the other.


paper bag books There are several ways you can bind your paper bag albums. You can punch 3 or more holes down the left side and later use ribbons to tie them together.

bindings for paper bag books Or you can sew down the center, creating a sewn spine.

sewn spine paper bag book Another option is to bind them with a bind-it-all if you have one.
Or use metal rings, which you can purchase at scrapbook stores.
Once the holes are punched you could also thread ribbons through the spine.

To create additional inside pockets you can use brads, eyelets, glue or even sew down flat bottom portion of the lunch bags.

Over the weekend I have made three of these & made them into valentines cards

Saturday, 13 February 2010

Scrapbooking me ~ page 2

Whilst spending the day in my craft room last week I had my new netbook upstairs with me so I was crafting & chatting with Alison whilst she was trying out ideas for projects for her forthcoming crop when she found this beautiful little mini album.

With the mini book closed

With the mini book openThis is page 2 of project " Scrapbook Me"

Link on elsies blog ~ scroll down the post.

So I thought I would have a go as part of the scrapbooking 'ME' theme.

I have used Stampin' Up Kraft card for the base of the project.

Cut two 4x4" paper squares and four 4x5" paper strips, I used brown card stock, you can also use patterned paper. Fold 1" so that you have a 4x4 square, and 1" flap, do this to all four paper strips.

Use glue dots on the back of the paper flaps, and glue each paper strip flap to each of the four sides of one of the squares.

Glue the second 4x4 paper square in the center to cover up the paper strips.

Now you can decorate with pictures, or just cute little notes and text, I am going to use this one as the centrepiece for a layout.


Thursday, 21 January 2010

My new album set arrived today

I have been looking at this for ages, for making mini albums & it arrived today
I cant wait for the weekend to arrive so i can have a play.
I also ordered some scrapbook planner pages & they arrived as well, so time has come to get organised.


http://i223.photobucket.com/albums/dd286/crsevices/Quickutz%20NEW%20RELEASE%20Holiday/Picture1-1.png

The Three Mini Albums In This Set Are Color Coded
And Named Their Own Cute Little Holiday Names:

Peppermint - Red
http://i223.photobucket.com/albums/dd286/crsevices/Quickutz%20NEW%20RELEASE%20Holiday/Picture1-2-5.png

Wintergreen - Green
http://i223.photobucket.com/albums/dd286/crsevices/Quickutz%20NEW%20RELEASE%20Holiday/Picture3-1.png

Sugarplum - Purple
http://i223.photobucket.com/albums/dd286/crsevices/Quickutz%20NEW%20RELEASE%20Holiday/Picture4-1.png

Yes, Your Gift Set Starts Off With The THREE Mini Albums Above!


A Limited Exclusive Holiday Lowercase Cookie Cutter Alphabet
And Numbers
Approximately 1" In Size
http://i223.photobucket.com/albums/dd286/crsevices/Quickutz%20NEW%20RELEASE%20Holiday/Picture5-1.png

OH, There Is More!!!


You Will Also Get 18 Cookie Cutter Die In Many Different Shapes
http://i223.photobucket.com/albums/dd286/crsevices/Quickutz%20NEW%20RELEASE%20Holiday/Picture6-1.png


Monday, 15 June 2009

Work In Progess ~own up who has finished theirs!

During our crop & craft session a couple of weeks ago Jane was trying out a project for a mini book using Money envelopes, Alison, Angie & I decided we would love to try the project under Janes tutorledge.
The mini book took over two hours on the night & was nowhere near completion, over the last couple of weeks between projects I have been finishing off the book. I still have all of the insides to complete using parcel labels and i still have to decide what theme to make the book into.......any ideas welcome, but here is the project so far.


The paper used is little yellow bicycle. The velvet Ric rac is by Maya road.


Own up girls, how's your mini book shaping up?


Related Posts Widget for Blogs by LinkWithin

Stampin' Techniques

Stampin' Techniques
Two step Stampin

Watercolouring

Masking

Markers

Rock n roll

Stampin' Pastels

Heat embossing

Crafts are here

Crafts are here, crafts are there,

My craft supplies are everywhere.

I really should clean this mess,

but I like it I confess.

Floor is littered, chairs are piled,

Kitchen's looking pretty wild.

On the table, counter too,

Seems that any place will do.

Hall is stacked with cartons high,

filled with things folks like to buy.

Garage is full, but so far....

there's still room to park the car.

I never have an idle day,

New ideas come my way.

Don't know yet what I'll create,

but my imagination's great.

My family smiles, they don't complain,

although at times I am a pain.

but when all is said and done,

I really am a crafty one!

I"ve been visited

link to free hit counter html code
Visit the hit counters gallery.

Guest book

NeoCounter