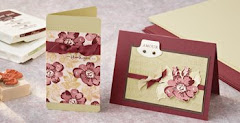
The final all day event for 2012

Here are the dates for 2012 Experience days that Sharon & myself have organised.

Now Booking

Saturday 1st December at Hethersett Village Hall for the last all day event of 2012 & a Christmas Card & gift event
Theme - A whole day crafting
Cost - £25

Future Dates:


Saturday 1st December ~ Christmas gift event

And don't forget for every event you attend you will receive a FREE raffle ticket which could win you a
BIG SHOT BUNDLE.

(Draw to take place during December's Event)

All DAYS HAVE VERY LIMITED PLACES SO BOOK NOW TO AVOID DISAPPOINTMENT. YOUR PLACE IS ONLY SECURED ONCE PAYMENT IS RECEIVED.


Do you fancy a catalogue party?

Did you know that you can qualify for hostess benefits without having to hold a party?

Just by showing your catalogue around to your family, friends or craft group, If you collect together orders totalling over £150 you will qualify for a free hostess benefits.

If your interested please contact me for further details.

Search This Blog

Contact me

Stampin' Up Contact details I have set these business hours to preserve my home / work life balance.

Email ~ Anytime ~ lovellsinnorfolk@hotmail.co.uk
Or call me between 9.30 Am ~ 8Pm ~ 07092984580


Thursday, 10 July 2008

Just using up some bits & pieces

Great Impressions stamp

In between doing the housework & washing yesterday I kept nipping into the craft room to make a few cards, using up some of the stamped & coloured images laying around on my desk.


Pink petticoat download


Sugar Nellie Pirate stamp
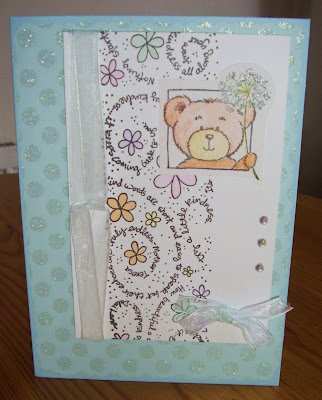
Stampin up wheel, great impressions stamp.

Dino mite is from the pink petticoat downloads

Wednesday, 9 July 2008

Spiral Whisper is coming with blog candy


Spiral whisper is a new English stamping company coming soon
Click on the link & pop over to there blog......they have candy.

Dont work too hard


The moral of the story has to be don't work too hard

Choose your words carefully

Choose your words carefully
Whilst I was demonstrating heat embossing at a demo session in the store I work in I was talking to a lady & explaining how the thermo graphic embossing powder worked & showed her whilst talking. She eagerly gathered powders, pads & a couple of stamps and came back to watch the rest of the demo. At that point I had got out the heat gun & started heating. The lady was watching intently & asked if a hair dryer would do the same job as she had already overspent with all the bits items she was holding, I explained it didn't get hot enough & would also blow the powder away. I told her that people had used a toaster and added to use a wooden peg to hold the stamped image and gently hold it over the toaster whilst it was on until the powder changed.
A couple of weeks later she came back again whilst I was doing a demo to buy a heat tool as the toaster method didn't work as it caught fire & set off the smoke alarm. I said i was sorry to hear that to which she added she had also burnt her finger trying to retrieve the stamped image from the toast slot !!!! It turned out she had posted her image like a slice of bread & turned her toaster on & left it.


Top tip of the day

My name is Lisa i'm a self confessed hoarder, so when I had finished making my batch of 30 cards last night I had 3 lengths of ribbon left that tied the cards & envelopes in bundles but it was badly creased, so I put it on one side making a mental note to iron it next time I had the iron out, too get the iron out would be fatal as guilt would take over & I would have to tackle the ironing pile.
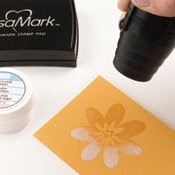
I was sitting in my craft room waiting for my hair straighteners to heat up & it came to me, and it worked, pull the ribbon through the hair straighteners whilst they are switched on and lovely pressed ribbon. Just a shame I couldn't come up with a time saving idea for the ironing.

Tuesday, 8 July 2008

Working my way through a 30 card order


I wont get much time this week for individual cards or creating this week as I have an order for 30 baby thank you cards that I got asked to make for a neighbour.
The problem I have is how much to charge I usually charge £1.50 for my cards unless they are very labour intensive. So I am in a real quandary.
The card is an A6 double sided pearl card blank stamped with thank you, a stamped & embossed image matted on pearl card stock, two rows of glitter peel off, a mini button or a mini hand tied ribbon bow & a printed insert with a doubles sided pearl envelope.


Update: after posing the same question on the Docrafts forum & opening a real can of worms, with many people saying that they charge similar prices, the consensus of opinion was that £1.50 was too cheap for a handcrafted card & as crafter's we under value ourselves.

So i decided that as we hadn't previously agreed a price for the batch of cards I would charge half of my normal price, but stating that it was a special price, that way should I get any further orders I am not committed to the same price & if they want christening invites or thank you cards I have room for negotiation, I thought that this seemed fair.
Sadly the images don't show how beautiful the two tone pearlescent cardstock is by Anitas ~ Timeless pearlescents range.

Sunday, 6 July 2008

What else does it need ?

What else does this need?
I keep looking at this card & cant help feeling that it needs something else, I know that less is more but I don't feel that this card is finished.
Any ideas are welcome.......


Many thanks for all of your suggestions, I decided to go with the flowers, I have used 3 double layer prima flowers with a tiny gemstone brad in the middle.

"new & improved version"

Using up the little bits

After finishing my bind-it-all project and my penny Black Saturday challenge I had some of the lovely Nitwits collection papers left over, being a canny crafter I just had to use them all up.


Blog candy winner ~ What are you lovin at the moment.


The blog candy winner from "what are you lovin at the moment"
is.........
Dramatic pause that drives you all crazy.......

comment 16 ( the date of my birth )

Ang C said...

I'm loving the new cuttlebug embossing folders

please get in touch by Wednesday to give me your snail mail address so I can get the candy in the post too you.
I will post some candy pictures once the candy is in the post, that way it will stay a nice surprise for Ang C.

Thanks everybody for your comments I enjoyed reading what you are all loving at the moment


YAY!!! Got an award!!

Thank you Ruth
For this award.
I am chuffed to bits! The rules for this award:
1. The winner can put the logo on her blog.
2. Link the person you received your award from.
3. Nominate at least 7 other blogs.
4. Put links of those blogs on yours.
5. Leave a message on the blogs of the girls you've nominated.
It's been hard to find 7 friends who don't already have this award, but the 7 I am going to nominate are:-
Kerry
Louise
Carol
Robyn
Sammi
Dawn


Saturday, 5 July 2008

Laurel & Hardy


Laurel & Hardy decoupage card for a card order

Penny Black Saturday challenge 4


So onto this weeks challenge:

Challenge 4 - Buttons & Brads

Your cards must feature at least one or preferably both


Buttons

Buttons & Brads


Thursday, 3 July 2008

Penny Black Saturday challenge 3


This week we would like you to use the colours


pink, brown and green

Don't forget you must include at least 1 PB stamp or image and
its entirely up to what you make - card, atc, altered art etc..


Okay take your pick as I couldn't decide


The papers are from a download kit by Nitwits

Blog candy ~ update

As I was ill last weekend I have extended the date on my blog candy
I will do the draw this Saturday at 4pm
You just have to tell me what you are Lovin at the moment.


Design teams

Can anybody share some advice on how you get your work selected to be part of a design team? I have seen lots of people are on design teams for various companies & was wondering did you apply or get invited & what kind of commitment is involved.

Wednesday, 2 July 2008

My first bind it all project

Well the postman eventually came on Monday, by the time I unpacked the box it was nearly bedtime & Tuesday I was ill all day so today is the first chance I've had to play with my new toy. I had already downloaded the paper collections from Nitwits
to make my Mum's birthday card.


I used 500gsm card cut into 3 tag shapes

Covered each side with different papers using pva glue

Using the Bind it all I put the three tag shapes together......Wow !!!
I'm very impressed with my new tool.


Through the back of the binding I tied assorted colours & types of ribbon.


The big flower is a Prima flower & the flowers on the right hand page are from the Nitwits collection and the buttons in the middle have ribbon tied through them & knotted.


All of the embellishments on this page are in the download collection, for the verse I put the printed paper through the printer again for the verse to be printed on co-ordinating paper.

Ok, I gave in!!!


I ordered the TSV today on QVC! The big bite!!! In pink!!!! With gromlets!!!! Good price even with the p&p charge as I had one in my hand at the Range the other day for £35 and put it back and it had no gromlets!!!!


Saturday, 28 June 2008

Royal Norfolk Show 2008

Royal Norfolk Show 2008

on Thursday we all went of to the Royal Norfolk Show, for those of you that don't know this is the county's major agricultural show. We thought it was about time we went as we have lived in Norfolk 7 years next week & have never been.

Abi posing with the radio Broadland Lotus


Lavender from the garden of the lavender-stamper


Friday, 27 June 2008

Fork Flowers


HOW TO MAKE FORK FLOWERS
These little flowers come in handy to decorate small items or when you need a pom-pom to match your yarn.
Years ago my children spent many a creative hour making colorful fork-flower necklaces.
You will need a fork with four tines or prongs. You can use a metal or plastic fork. When using a plastic fork, do not pull the yarn too tightly as this will bend the tines of the fork resulting in a smaller flower.
To make the flowers:
Cut a 7-inch piece of yarn and place between the center two prongs of the fork. Hold with left thumb and index finger. This is the tying strand.
Using yarn directly from the skein slip the end of the yarn under your thumb to hold for the first few rows. Bring yarn up through center prong then weave back and forth over and under the prongs. Continue to weave pushing yarn down tightly until the entire fork is filled. Holding the weaving in place with you left hand cut the yarn.
Have someone bring both ends of the tying strand up to the top of fork and tie a knot. Now slip the yarn off of the fork while the knot tight is pulled tighter. With a little practice you may be able to do this by
yourself. Tie a second knot to hold. I have found that by dampening the tying strand, it will hold the first knot more securely until the second knot is tied.
Fluff up the result and you have a small flower. Clip the loops and trim for a pom-pom. To make a two-toned flower or pom-pom use two strands of contrasting yarn together when weaving.


Related Posts Widget for Blogs by LinkWithin

Stampin' Techniques

Stampin' Techniques
Two step Stampin

Watercolouring

Masking

Markers

Rock n roll

Stampin' Pastels

Heat embossing

Crafts are here

Crafts are here, crafts are there,

My craft supplies are everywhere.

I really should clean this mess,

but I like it I confess.

Floor is littered, chairs are piled,

Kitchen's looking pretty wild.

On the table, counter too,

Seems that any place will do.

Hall is stacked with cartons high,

filled with things folks like to buy.

Garage is full, but so far....

there's still room to park the car.

I never have an idle day,

New ideas come my way.

Don't know yet what I'll create,

but my imagination's great.

My family smiles, they don't complain,

although at times I am a pain.

but when all is said and done,

I really am a crafty one!

I"ve been visited

link to free hit counter html code
Visit the hit counters gallery.

Guest book

NeoCounter