The final all day event for 2012

Here are the dates for 2012 Experience days that Sharon & myself have organised.

Now Booking

Saturday 1st December at Hethersett Village Hall for the last all day event of 2012 & a Christmas Card & gift event
Theme - A whole day crafting
Cost - £25

Future Dates:


Saturday 1st December ~ Christmas gift event

And don't forget for every event you attend you will receive a FREE raffle ticket which could win you a
BIG SHOT BUNDLE.

(Draw to take place during December's Event)

All DAYS HAVE VERY LIMITED PLACES SO BOOK NOW TO AVOID DISAPPOINTMENT. YOUR PLACE IS ONLY SECURED ONCE PAYMENT IS RECEIVED.


Do you fancy a catalogue party?

Did you know that you can qualify for hostess benefits without having to hold a party?

Just by showing your catalogue around to your family, friends or craft group, If you collect together orders totalling over £150 you will qualify for a free hostess benefits.

If your interested please contact me for further details.

Search This Blog

Contact me

Stampin' Up Contact details I have set these business hours to preserve my home / work life balance.

Email ~ Anytime ~ lovellsinnorfolk@hotmail.co.uk
Or call me between 9.30 Am ~ 8Pm ~ 07092984580


Thursday, 28 February 2008

Sakura Pens

Gelly Roll Glaze - 16 colours available


Glaze is a 3D pen - while the nib is pressed to the paper the ink continues to flow, this is due to a spring and ball bearing system - unique to Sakura. The ink is translucent, bright and dries glossy.

Glaze will work on all smooth non-porous surfaces - card, acetate, plastic, glass, ceramic, metal .... It will not work on shrink plastic as it cracks and falls off as it shrinks (unless of course you use your pen after it has shrunk.

Glaze colour's can be mixed or bled together, especially easy on a shiny surface as it takes a little longer to dry. Drying time is about 1 minute on card and on shiny surfaces a little longer. However, if you want to apply a second coat wait a few minutes to ensure the Glaze has hardened.

While the ink is still wet you can add glitter. You can use the clear pen to highlight areas on backing papers, write on dark card or create a resist (on light coloured card write, then rub over dye based ink).

When colouring colour across your project and do not go back (until it is dry) as you can scuff the ink up and spoil the finished look.

Don't forget to take the tiny cap off the nib and throw it away when you have brand new pens.

  • Can be used on all smooth surfaces, such as acetate, metal, glass, cardboard and paper. In addition, it can be used to decorate scrapbooks, jewellery and for other handicraft purposes.
  • The ink requires approximately 60 sec. to dry and remains shiny.
  • The unique ink gives the lines a 3-Dimensional effect.

Application

  • Before use, remove the protective cap covering the tip of the pen (does not need to be replaced).
  • The ink starts to flow as soon as the point is pressed onto the surface to be decorated.
  • Store the pen horizontally with the cap on.
  • Colours can be mixed
  • Once the ink is dry, Glaze 3D-roller is water-repellent

Colours can be bled and blended - especially when using on surfaces such as acetate or metal.

Gelly Roll Stardust - 25 colours available

Stardust is Sakura's glitter pen. There is so much glitter in the ink it is amazing that the ink flows so smoothly between the 2 ball bearings.

You can use them on light and dark coloured card, all colours of shrink plastic, and watercolour with them.

To watercolour with the Stardust pens, tap the ink out onto some plastic I use acetate, and using a Waterbrush add water and make the colour as pale or as strong as you need, then just paint it on. When the ink dries you will still see the glitter sparkling away.

To use Stardust on shrink plastic I would use the shrink plastic with the rough coatings - but I have used the clear one as well. Stamp with Staz On, if it is a new pad then once stamp is inked place it gently on scrap paper before stamping onto the shrink plastic. This is to remove any excess otherwise the ink would bleed through the rough coating on the shrink.

New Gelly Roll Metallic - 14 colours available

The Metallic pens have be updated - the colours and the pens themselves. They now have the double ball bearing system in the nib and the colours have been greatly improved the gold and silver are lovely.

They will work on card, dark card, shrink plastic and water them down with a Waterbrush and paint them on.

Gelly Roll Moonlight - 10 colours available

The Moonlight pens, again have the double ball bearing nib, making them lovely smooth to use. There are 5 'flourescent' colours and 5 'pastel' colours.

They have fantastic coverage on dark coloured card. The will work on acetate - but it is best to colour from reverse side as ink can be scratched off - unless you mix it with clear Glaze.

Moonlight will also work direct on your stamp - with a good huff, Fimo Clay, gloss card and again on metal if you mix it with clear Glaze.

Gelly Roll Souffle

See home page for offer

  • Available in 10 colours, including real white.
  • Can be used on all smooth surfaces, such as plastic, metal, glass, cardboard and (coloured) paper. In addition, it can be used to decorate scrapbooks, jewellery and for other handicraft purposes.
  • The ink requires approximately 60 sec. to dry.
  • The unique ink gives the lines a 3-Dimensional effect.

Application

  • Before use, remove the protective cap covering the tip of the pen (does not need to be replaced).
  • The ink starts to flow as soon as the point is pressed onto the surface to be decorated.
  • Store the pen horizontally with the cap on.
  • Colours can be mixed.
  • Once the ink is dry, Soufflé Deco-Roller is water-repellent.


Todays words of wisdom

When I die, I want to die like my grandmother who died peacefully in her sleep. Not screaming like all the passengers in her car.

Wednesday, 27 February 2008

Finding time to play

Finding time to play with our craft stash is something we all complain about, at the moment I have 10 cards to make for family birthdays and occasions in February & March, whist I work through the list I am trying to find some time to play with my new Sugar Nellie stamps, making an exploding box, new Great Impressions stamps and I am also waiting for the delivery of the new Hero Arts clear cupcake set, on top of that I have two new pink petticoat downloads & two tinker & co downloads.

I have managed to try the flower cascade card that I cased from someone on Docrafts forum ( sorry I cant remember who ).
I then had an order come in during the day for two Mothers day cards


I have a day off from work today so I intend making the most off it and get some of these cards made.

I made this clutter card for my Mum as she loves flowers & her garden.
I also had to make this card for my children to send to my mum as both of the children have stacks of homework & the card needs to go in the post usually Abi will make the cards they send & they both sign them.

Todays words of wisdom

Only one shopping day left until tomorrow!

Colouring Digital Image Stamps - Watercolouring


Watercolouring your printed images may be a problem if you use an Inkjet printer for printing because the ink will bleed as soon as you put water to it.

But spraying your image lightly with an Inkjet Fixative, will seal the ink so you can.

For my Hettie image above, I printed a sheet of images onto 270gsm smooth finish white card, using the greyscale & photo settings on my printer & then sprayed it with my fixative.

(The fixative by Ghiant is available in 3 finishes - Matt, Satin & Glossy. I use Matt finish for watercolouring. I find the the others repel water too much to make watercolouring possible.)

I let it dry for around 10 minutes or so, added the colour from my watercolour pencils, then blended them with water. My brush wasn't dripping with water, but it wasn't dry enough for the bristles to separate either - just dabbed onto a tissue to take off the excess.

You can use the fixative to seal your image afterwards too if you like.

And voila! Watercoloured images : )


I cannot take credit for this information, I found it in a blog by liz who is the wonderful pink petticoat.

http://www.pinkpetticoat.blogspot.com


I missed it

My whole family slept through the earthquake, I cant believe it! Hubby thinks the animals felt it as the dog and cat were both jumpy about 1.05am, he didn't realise why until he went to work this morning and our friend that lives a couple of hundred yards away from our house asked if we had felt the eartquake, he thought it was someones washing machine on.

Todays words of wisdom


Just remember........if the world didn't suck, we'd all fall off.

Monday, 25 February 2008

Todays words of wisdom


Never argue with an idiot. The people watching might not know the difference.

Sunday, 24 February 2008

Family Cards Jan ~ Feb ~ March


Granddaughters 2nd Birthday

Special Niece 2nd Birthday
Granddaughters 2nd Birthday


The early part of the year seems to be really busy with family birthdays I have spent a lovely afternoon in my craft room, whilst the football was on. I will add all of the cards to this post.

Son's Birthday
Brothers Birthday


Nephew

Nephew

Sister-in-laws Birthday


Todays words of wisdom

A day without sunshine is like.................well, night.

Saturday, 23 February 2008

A random thought


If toast always lands butter-side down, and cats always land on their feet, what happens if you strap toast on the back of a cat and drop it?

3 Indiana jones cards for Colby's 5th Birthday

This is a real challenge Colby is my hairdressers grandson and he is Indiana Jones mad so I have had to make three different cards, 1 son & 2 grandson cards. The real challenge is this is the 3rd year I have made all of his birthday cards and he & his brother always wants an Indian Jones theme.

This years cards


Todays words of wisdom

The real art of conversation is not only to say the right thing in the right place, but also to leave unsaid the wrong thing at the tempting moment.

Sometimes the road less travelled is less travelled for a reason.
Jerry Seinfeld

Friday, 22 February 2008

Free template sites

Here are some template sites.

http://www.meltmyheart.com/temps.html
http://www.twydiink.com/freestuff.htm
http://web.archive.org/web/20070130114410/www.bydonovan.com/templates.html
http://www.mirkwooddesigns.com/templates.htm
http://www.paperzone.com/Crafter_Corner/cornerboxes.htm
http://www.victorineoriginals.com/
http://members.tripod.com/fransnewbeginnings/
http://www.sweetestthings.com/
http://members.aol.com/putrcraftr/howto/templates.html
http://www.boxstar.com/papershops/siteindex1.htm
http://www.stampin.com/tips.htm

Another good all round resource.

http://www.making-greeting-cards.com/instructions-on-card-making.html

1st Birthday cards


I have an order for 4 first birthday cards for the same little girl. This is the first one.
just one problem I now have to make an envelope as the card is not a standard size.


Todays words of wisdom

The 50-50-90 rule: Anytime you have a 50-50 chance of getting something right, there's a 90% probability you'll get it wrong.

"Every moment is a golden one for him who has the vision to recognize it as such." -Henry Miller


"I have always felt that the moment when you first wake up in the morning is the most wonderful of the twenty-four hours.

Thursday, 21 February 2008

Todays words of wisdom

If you must choose between two evils, pick the one you've never tried before.

Wednesday, 20 February 2008

A very random thought

Why do psychics have to ask you name?

Amazing scrap rooms & sheds

If you craft then I am sure that you will know how quickly the craft stash builds up, but can you imagine having all of this space, I would never be able to say no to buying anything.

Just take a look at these two scrap rooms.


http://imascrapbooknut.blogspot.com/2007/09/as-promised.html

http://scrappinconnie.typepad.com/photos/scrappin_shed/index.html

I am now off to tidy my craft room and hopefully create a few bits.

Links to free decoupage sheets

The sites listed below all have decoupage sheets, background papers & clipart that you can use for your own personal use.

Some of these sites may not work from time to time.


http://beautiful-backgrounds.20m.com/index.html

http://cp.c-ij.com/english/3D-

http://cp.c-ij.com/english/3D-papercraft/o...i/yukiwa_e.html

http://cp.c-ij.com/english/scrapbook/pattern/01.html

http://kforkards.tripod.com/freedownloads.htm

http://members.fortunecity.co.uk/msvicr/

http://members.fortunecity.co.uk/msvicr3/index.html

http://pixelpaintpapers.com/free-scrapbook-printables

http://s10.photobucket.com/albums/a139/worm_goddess/?

http://s33.photobucket.com/albums/d71/alottment1/

http://s34.photobucket.com/albums/d130/Craftypixiedust/

http://s35.photobucket.com/albums/d182/3dsheets/

http://s43.photobucket.com/albums/e356/iss.../free%20papers/.

http://s44.photobucket.com/albums/f3/3d_sheets2/

http://s80.photobucket.com/albums/j199/belongstofats/

http://shabbyprincess.com/downloads.asp

http://teabagtiles.mysite.wanadoo-members.co.uk/index.html

http://twopeasinabucket.kaboose.com/digita...free_200512.asp

http://users.pandora.be/linsey.marijne/plaatjes.htm

www.3dsheets.tripod.com/index.html

www.activityvillage.co.uk

www.atomiccupcake.com

www.backgoundcity.com

www.brainybetty.com

www.brownielocks.com/cards.html

www.buygiftpaper.com

www.cardmakingandpapercraft.com/downloads.asp

www.carenscuties.com

www.ciaspalette.com

www.clipartgallery.com

www.craftcafe.com

www.craftclipart.com

www.craftycomputerpaper.co.uk/Christmas%20graphiics%20page.htm

www.creativewallcovering.com/wallpaper-292.html

www.cuddlecreekgraphics.com

www.cuddlybuddly.com

www.cutecolors.com

www.cutecolours.com

www.dafont.com/theme.php?cat=201&page=4

www.daisiecompany.com

www.debbiesite.zoomshare.com/1.shtml/Christmas%20backing%20paper

www.decoratetoday.com

www.devoniandecoupage.piczo.com/?cr=6&rfm=y

www.dltk-kids.com

www.ellenedith.com/html/fabric_bluecat.html

www.epson.com/cgi-bin/Store/PrintLab/pl_home.jsp?

www.eskimo.com

www.fabricattic.com

www.fairychildren.com/b-w.shtml

www.fredandmartyproductions.com/scrapz.html

www.freecraftunlimited.com/patterns.html

www.freedigitalscrapbooking.com/digital_scrapbooking_papers.html

www.fromtheheartpostcards.com/ChristmasBackgrounds.html

www.genealogy-shopper.com/catalog/index.html

www.geocities.com/Heartland/8381/

www.grandyscupboard.com

www.graphicgarden.com

www.hellasmultimedia.com/webimages/default.htm

www.images-passions.com

www.imagiart.com
www.jessicagornydesigns.blogspot.com/

www.karenfosterdesign.com

www.madaboutcards.com

www.making-greeting-cards.com/homemade-cards-sitemap.html

www.mayang.com/textures/

www.mchooii.net

www.me-2-you.net

www.ming-ling.net/patterns/about.html

www.montispixelplayground.com

www.moonbowgraphics.com

www.papercraftinspirationsmagazine.co.uk/resources/papercraft/augustpapers.pdf

www.pcrafter.com

www.pingdesigns.com/free%20kits.htm

www.porterfieldsfineart.com/tableofcontents.htm

www.poundworks.com/tiles.htm

www.primdoodles.com

www.printmini.com

www.raggedyscrappin.com

www.rainbowrowgraphics.com/tiles.htm

www.sassyprints.com

www.scrapbookbytes.com

www.scrapbookscrapbook.com/themes.html

www.scrapgirls.com/store/category.php?cat=21

www.sfsu.edu/~jtolson/textures/textures.htm

www.shadow-graphics.com

www.simplescrapbooksmag.com/download/digital/

www.tatty-teddy.net

www.teabagfolding.circleofcrafters.com/freeprintabletiles.html

www.thelilacgarden.co.uk/floral%20pinklily.html

www.thelittlepillow.com/albumpgdl.html

www.theprimmarket.com

www.tickie.net/Backgrounds/stainedglass/BGtiles-SG.htm

www.uwrapit.com

www.victorianas.com/01gallery.html

www.wallpaperwholesaler.com/search.asp

www.wtv-zone.com/Marvaline/MyPsp/HeartisticExp.html

Todays words of wisdom

Dogs have owners. Cats have staff.

Tuesday, 19 February 2008

Todays words of wisdom

When life knocks you down to your knees, just remember thats a perfect position to pray.

Monday, 18 February 2008

A joke for today

The Gifts Of The Three Sons

Three sons left home, went out on their own and prospered. Getting back together, they discussed the gifts they were able to give their elderly mother.

The first said, "I built a big house for our mother."

The second said, "I sent her a Mercedes with a driver."

The third smiled and said, "I've got you both beat. You remember how mom enjoyed reading the Bible? And you know she can't see very well. So I sent her a remarkable parrot that recites the entire Bible. It took elders in the church 12 years to teach him. He's one of a kind. Mama just has to name the chapter and verse, and the parrot recites it."

Soon thereafter, mom sent out her letters of thanks:

"Milton," she wrote one son, "The house you built is so huge. I live in only one room, but I have to clean the whole house."

"Gerald," she wrote to another, "I am too old to travel. I stay most of the time at home, so I rarely use the Mercedes. And the driver is so rude!"

"Dearest Donald," she wrote to her third son, "You have the good sense to know what your mother likes. The chicken was delicious."

Todays words of wisdom

Male menopause is a lot more fun than female menopause. With female menopause you gain weight and get hot flashes. Male menopause you get to date young girls and drive motorcycles.

Todays words of wisdom

In the 60's people took acid to make the world weird. Now the world is weird and people take Prozac to make it normal.

Sunday, 17 February 2008

Todays words of wisdom


The easiest way to find something lost around the house is buy a replacement.
Saturday, 16 February 2008

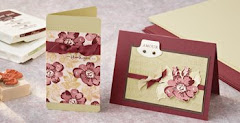
Hubby's Valentine & 1st Teardrop card

I got sent this brilliant template after seeing the teardrop cards on Docrafts gallery. So a big thank you to karen for the template.

The stamp is by penny black "I'm so cute " I love penny Black they are in my top 5 favourite stamp companies. The card is Bazzill & the printed card is pizzazzil.

Todays words of wisdom

On the keyboard of life, always keep one finger on the escape key.

Tuesday, 12 February 2008

Todays words of wisdom

Light travels faster than sound. This is why some people appear bright until you hear them speak

Monday, 11 February 2008

Todays words of wisdom

Everyone has a photographic memory. Some just don't have film.


Sunday, 10 February 2008

stampin up ~ In the wild


Another couple of cards from yet another Stampin up set. In the wild is a six piece retired set which is ideal for mens cards.


I stamped these images nearly 2 weeks ago and they have been just sitting there on my desk, but I lacked some inspiration, but now I have made a couple of cards using this set I will have a play with it and make a few more before I clean the stamps up. This was a whole different concept for me as it's not very often I stamp an image without colouring any of it.
I am really enjoying playing with the colour co-ordinated card packs from Stampin up.

Todays words of wisdom


Some people are like Slinkies . . . not really good for anything, but you still can't help but giggle when you see one tumble down the stairs.

Saturday, 9 February 2008

Just arrived


My order from the stamp of the month club has just arrived, that was so speedy....So i will just have to make some time to have a play this weekend.
The stamp of the month club is the run by michelle and the stamps are the wonderful "great impressions" on her site there are project sheets for the monthly collections.
http://stampstash.com

Feeling better


As you can see I am back blogging, thank you everyone who e-mailed me & left comments wishing me a speedy recovery.
Whilst being ill kept me out of the craft room, it didn't keep me off the laptop. I spent some lovely hours blog hopping, I am constantly amazed & inspired at the creativity of our on-line community and my new crafting buddies.
If you get 10 minutes just have a look through my blog roll and pick any blogger at random and have a read.......I am sure you will be inspired.
I also spent some time reading the docrafts forum and looking through the gallery, another really talented bunch. Many crafter's have been using some craft cd's and many of the modern cards had been created using cd's by "pink petticoat".....that rung a bell and I had to go & check through my own cd's. I found 7 cd's by pink petticoat that I had never used. So my task this weekend is to make some cards using my pink petticoat cd's.

Positive Attitude
Positive Attitude

"When the best and the brightest come together, the possibilities are endless."

Teamwork
Teamwork

Individuality ~ Have the courage to follow your own path.

Individuality
Individuality

Todays words of wisdom

"If you cant be a good example then at least be a horrible warning."

Making Backgrounds using Marvey Metallic pens

Making Backgrounds using Marvey Metallic pens
Marvey Metallic Pens are perfect for rubber stamping. They are high quality water-based pigment ink pens with a chisel tip. Fade proof and waterproof they cover most surfaces - glass, wood, porcelain, clay, leather, cement, plastic, tiles, and more. Always shake the pen well before use to mix metallic and colour elements.
Marvey can be used for making dramatic backgrounds, colouring stamped images and applying direct to stamps for metallic and iridescent effects. Over stamping and embossing is easy on the dried work.
Marvey Metallic Backgrounds
  • Using black glossy card, lightly dampen and scribble bands/areas of various colours quite densely onto the surface. Sprit lightly with water and tip the card from side to side, and around to mix colours. You may need to add more water to get the effect you want.
  • Partly dry/move colour around the card with a heat gun although natural drying is best.
  • Beware of soaking up spare water as this often soaks up the colour, leaving the metallic effect only.
  • Also try on mirror and other metallic card/paper.
  • Not quite as effective on white card but try using over card pre brayered or sponged with dye inks for a vibrant effect.
  • Add embossing powder while wet and heat for a dramatic finish.
  • Press under books overnight to flatten card.
Marvey Metallics and Cling Film
  • Use glossy, semi-gloss, sandgrain (a lovely reflective texture) or satin card.
  • Lightly spray card with water. Paint, dab, sponge etc (fingers useful although unprofessional) colour onto card.
  • Scrunch up a piece of Cling Film then open out and place over painted card. With wax paper/ plastic under and piece of paper over press –under books –or in press until dry. This will take some time but worth waiting for as the effects are lovely.
Marvey metallic plus dye ink dabbed onto a piece of tissue and then randomly applied to gloss card. Sponge dye ink over for lovely effects with depth. The true effect develops some time after drying.
Direct onto stamp:
Use solid or semi solid images and black or dark card for best results.
Apply the pen directly onto the stamp. If using two colours make a small pool of the second colour on a palette. Dip part of the stamp into the colour or apply with a brush or dense sponge. Only spritz if the colour is too dry or the image will be very fuzzy.
Colouring:
The chisel point does not allow for detailed colouring but it is still possible to use for metallic accents or shading large images. Especially effective when used on stamped acetate. Apply the colour under the stamped side and take care not to go over the edges – lovely over Twinkling H2o backgrounds.

Bleaching and Varnishing for Stampers and Crafters

It's hard to believe that ordinary household bleach applied to plain card can produce such a wonderful rainbow of colours. Not all card bleaches to reveal layers of unexpected hues depending on how much bleach is used. Teamed with varnish, tea dye varnish in particular, plus a few other colouring materials outstanding effects and hues can be achieved with just a few simple techniques.

The following facts and figures will make the process more interesting, its helpful to understand products and materials. As usual, the best advice is to experiment yourself and discover new and unusual effects.

Bleach:

  • Use cheap or at least plain bleach. Thin is best but thick works also.
  • Use fresh bleach; after a session, pour down the sink or WC and decant fresh for the next use.
  • Beware of spills on furniture, clothing and hands, keep a damp cloth and kitchen roll nearby and cover your work surface; big thick plastic mats are perfect.
  • For colouring make three mixes; one plain bleach and one half/half with water and one water only with a container of water for washing brushes; wash and dry frequently.
  • Change the scrap paper underneath your work frequently as bleach residue will spoil your work.

Brushes:

  • Never use hair brushes, they will 'melt' in the bleach but use nylon 'Prolon' or similar.
  • Very small brushes - 1 to 000 sizes - are necessary for fine work and accurate colouring, with bigger ones for backgrounds etc.

Paper and Card:

  • Bleaching results depend on the dyes used and the dying process which is why darker card bleaches most dramatically. The layers of dye show depending on the strength of the bleach removing each layer plus the absorbency of the surface. Light colours can bleach to pretty pastel tones, but yellow and other primary colours often only fade when bleached.
  • Not all card bleaches, black is commonly resistant to bleach, there is no way of telling except to try.
  • Many recycled papers do not bleach; you just have to try them; others just fade in colour.
  • Do not expect to get pure white from any card by bleaching there is usually dye left even with repeated bleaching.
  • Paint/ink can be used over bleach but is usually superfluous, try for yourself.
  • The best papers that I have found are pastel papers; Canson Mi-Teinte 160 grams and Fabriano Tizziano 160 grams.
  • Other card often bleaches well, just try, if you find one you like make a note.The best way to test is to cut 1cm wide strips and dip in the bleach. Mark the strips to identify and staple together.

Bleaching techniques:

There are three main uses for bleach. Stamping, colouring and backgrounds.

  • For stamping use the bleach on a pad of paper towelling, I find that one sheet cut into four makes a good pad. Make two, one full strength and one half with water. Alternate the two to bring out different shades from the paper.
  • Experiment with stamps both outline and solid for effects . Practice brings lovely results even though at first they can be disappointing.
  • Uninteresting effects can be improved by sponging ink over or dabbing with cat's eye pad; no rules here, just try for yourself.
  • Clean the stamp immediately with lots of water and dry well.
  • For colouring stamped images stamp and emboss the image, open designs are best to start with and colour carefully to the embossed edges, bad filling-in shows more than with paint.
  • Alternate strong and weak bleach mixtures according to your card and the effect you want to achieve. You might have to wait for the bleach to develop to see the finished effects.
  • Sponging lightly over with Brilliance Galaxy Gold or other metallic ink can 'lift ‘ an image and make it shine.

For backgrounds and freehand effects:

  • Wet the paper /card before bleaching for mottled effects applying various strengths of bleach over the card and leaving to dry.
  • Over stamp, emboss or sponge on colour.
  • Combine with tea dye varnish in varying strengths, paint, PearlEx, or dyes for dramatic effects.
  • Add messages or words to a card using a word stamp or writing with a calligraphy pen. This is beautiful if you have a good hand. Try also using with a pen for patterns, scrolls etc. there is little to loose by trying!

Varnishing:
Acrylics are water based so easy to clean and fairly quick drying.
They come in several finishes, matt, semi gloss and gloss and as well as protecting work will add a very durable enamel like finish of choice. Available as liquid brush on or in spray cans which is quick and easy to use. Always follow instructions.

Tips:

  • Mix varnishes with acrylic paint, PearlEx or dye inks for a transparent paint.
  • Tea dye varnish is perfect for aging work or for decorative touches and works really well with bleaching.
  • Use as paint to colour parts of an image, try mixing with PearlEx for lovely pearlescent colours.
  • Sponge or stipple onto card for backgrounds and to frame bleached images.
  • Use all over for an aged, antique effect; works best over autumn colours.
  • Dilute and use on wet paper/card combined with bleach and PearlEx or bronzing powders for impressive background effects.
  • Metallic rub-on waxes can be applied to dry varnish and glitzy bits and glitter dropped on while wet.

How to use embossing powder

Embossing adds an elegant, dimensional element to any stamped image. It may look difficult, but is in fact one of the most popular and effective rubber-stamping techniques of all.

The secret is to use a heat gun, a quality pigment inkpad, deeply-etched rubber stamps and good cardstock - and take the inkpad to the stamp. Most errors in embossing happen due to unevenly inked images.

Applying ink

The best way to apply ink to the stamp is to lay the stamp on its back, rubber side up, then dab or pat with the ink pad. This way it is easy to apply a thin even coat of ink.

Apply the inked stamp to the cardstock and press down firmly. Try not to rock the stamp (which will result in a blurred image). Some people find it easiest to stand whilst stamping as they get better pressure. Remove the stamp, and apply embossing powder immediately. Pour a generous amount of embossing powder all over the image. (The trick is to get the powder onto the stamped image before it dries. Pigment ink is a slow-drying ink, and gives you enough time to do this.)

Turn the stamped image over and tap the back of the card to remove any excess embossing powder. Keeping a piece of scrap paper under the cardstock helps to catch any excess, and makes it easier to the powder back into its pot to use next time.

Tip

Adding extra embossing powder will not help the image to be any shiner etc. Powder will only stick to the wet ink, so always tip away any excess powder as it will only result in a fuzzy, blotched image.
Don't blow excess powder away - it will go all over the card and your breath will moisten it. There is also a danger you could blow powder off the inked image.

Embossing

Apply heat - use a designated heat tool/embossing gun. There are several on the market. If you don't have a heat gun, you may use a paint-stripping gun (but be careful not to set the cardstock alight). Otherwise, heat from below: wave the cardstock over an electric hotplate, or turn an electric toaster on and wave the card over the opening. Mind your fingers (and if using a toaster, do NOT place the card inside it!) If the card is a little wavy/distorted after heating, allow it to cool down and weigh under some heavy books - it will flatten again.

Using a heat tool (if at all possible - it really does make a difference to the result) aim it at one area of the powdered image. The heat will affect the powder: it will change colour, become shiny or sparkly (depending on what powder you have used). As soon as one area has changed colour, move your heat gun to the next area and so on. This is called "chasing" the image. Don't wave the heat gun all over the card - all you are doing is heating the entire card and the image will take forever to emboss properly.

Cleanup

Never wash a rubber stamp under the tap. Either use a designated stamp cleaner, a stamp scrubbing pad (just run under the tap, and wiggle the dirty stamp over the fibres to clean - then dry on kitchen roll) or dampen a pad of kitchen roll and wipe over the stamp. Filthy and clogged stamps can be cleaned with an old toothbrush - dampened with water or stamp cleaner. Rinse off by wiping with damp kitchen roll, an old flannel or towel, then dry with kitchen roll

Alchol-free baby wipes are excellent for cleaning stamps, hands, and also to remove most inks from the top of the stamp (the wood block). Finish by blotting with kitchen roll.

F.A.Q.s

  • Q: Why is my stamped image uneven - more inky in some places?
  • A: Did you hold the stamp in your hand when inking it? This results in uneven application every time! Always place the stamp rubber-side upwards, flat on a hard surface and then ink up. The application will be even, and you can also check there are no missed areas.
  • Q: Does size matter?
  • A: Not in ink pads! Inking a stamp rubber-side up means you can use any size or shape of ink pad: Option Plates, Petal Points, Cats Eyes, mini Versacolour pads etc.
  • Q: Can I use a hairdryer to emboss?
  • A: No. A hairdryer is not hot enough to melt the embossing powder (pigments suspended in a polymer base) and will only blow the powder away.
  • Q: Does the ink need to be the same colour as the embossing powder?
  • A: No. The embossing powder is always the colour that you will see - so you could use pink pigment ink and gold embossing powder, and the result will be gold. Green pigment ink and black sparkle powder? The result will be black sparkle. If you want to emboss and also see the colour of the ink, then choose clear embossing powder as the colour will show through.

Trouble shooting

  • Q: The image looks "greasy".
  • A: This is because you heated it too long, and the powder has started to sink back into the card.
  • Q: The image is "grainy" and feels rough; some grains have fallen off.
  • A: You haven't heated the powder long enough.
  • Q: There are "speckles" of excess powder on the card, not just on the image.
  • A: Certain types of paper and card are very static (eg: vellums and glossy card) and you may notice little dots of embossing powder on the card. Wipe the card over with an Anti-static Pad or a used tumble dryer sheet before you start to eliminate the problem. Alternatively, use a dry fine paintbrush to dust away any excess.

Friday, 8 February 2008

Todays words of wisdom

...Perhaps they are not stars in the sky...But rather openings where our loved ones shine down to let us know they are happy...

Wednesday, 6 February 2008

Sorry

Sorry about the lack of creative items at the moment, I have been feeling really rough since the weekend with a sickness bug. I hope to feel well enough to be back in my craft room in the next couple of days.
Happy Crafting

Tuesday, 5 February 2008

Todays words of wisdom

Life isn't about waiting for the storm to pass...
It's about learning to dance in the rain.

Monday, 4 February 2008

Todays words of wisdom

A drunk mans words are a sober mans thoughts

Saturday, 2 February 2008

Todays words of wisdom

Dance Like Nobody's watching; Sing like Nobody's Listening; Love like you've never been hurt

Stampin up ~ Sweet of you


Sweet of you is a 6 piece stamp set from Stampin up.


I have been working with the card assortments from Stampin up and I am finding that I am becoming more experimental with my colour combinations and looking through there catalogue is also a great source of inspiration.


I have been having a play this evening, as the kids are on the computer & watching television and my husband has gone out on a paranormal investigation at the puppet theatre in Norwich, a very old building which is danger of being closed down due to losing its art's grant, he has been given the chance to go and do an investigation.


Related Posts Widget for Blogs by LinkWithin

Stampin' Techniques

Stampin' Techniques
Two step Stampin

Watercolouring

Masking

Markers

Rock n roll

Stampin' Pastels

Heat embossing

Crafts are here

Crafts are here, crafts are there,

My craft supplies are everywhere.

I really should clean this mess,

but I like it I confess.

Floor is littered, chairs are piled,

Kitchen's looking pretty wild.

On the table, counter too,

Seems that any place will do.

Hall is stacked with cartons high,

filled with things folks like to buy.

Garage is full, but so far....

there's still room to park the car.

I never have an idle day,

New ideas come my way.

Don't know yet what I'll create,

but my imagination's great.

My family smiles, they don't complain,

although at times I am a pain.

but when all is said and done,

I really am a crafty one!

I"ve been visited

link to free hit counter html code
Visit the hit counters gallery.

Guest book

NeoCounter