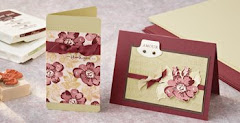
Embossing adds an elegant, dimensional element to any stamped image. It may look difficult, but is in fact one of the most popular and effective rubber-stamping techniques of all.
The secret is to use a heat gun, a quality pigment inkpad, deeply-etched rubber stamps and good cardstock - and take the inkpad to the stamp. Most errors in embossing happen due to unevenly inked images.
Applying ink
The best way to apply ink to the stamp is to lay the stamp on its back, rubber side up, then dab or pat with the ink pad. This way it is easy to apply a thin even coat of ink.
Apply the inked stamp to the cardstock and press down firmly. Try not to rock the stamp (which will result in a blurred image). Some people find it easiest to stand whilst stamping as they get better pressure. Remove the stamp, and apply embossing powder immediately. Pour a generous amount of embossing powder all over the image. (The trick is to get the powder onto the stamped image before it dries. Pigment ink is a slow-drying ink, and gives you enough time to do this.)
Turn the stamped image over and tap the back of the card to remove any excess embossing powder. Keeping a piece of scrap paper under the cardstock helps to catch any excess, and makes it easier to the powder back into its pot to use next time.
Tip
Adding extra embossing powder will not help the image to be any shiner etc. Powder will only stick to the wet ink, so always tip away any excess powder as it will only result in a fuzzy, blotched image.
Don't blow excess powder away - it will go all over the card and your breath will moisten it. There is also a danger you could blow powder off the inked image.
Embossing
Apply heat - use a designated heat tool/embossing gun. There are several on the market. If you don't have a heat gun, you may use a paint-stripping gun (but be careful not to set the cardstock alight). Otherwise, heat from below: wave the cardstock over an electric hotplate, or turn an electric toaster on and wave the card over the opening. Mind your fingers (and if using a toaster, do NOT place the card inside it!) If the card is a little wavy/distorted after heating, allow it to cool down and weigh under some heavy books - it will flatten again.
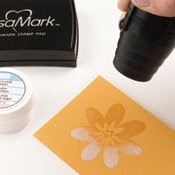
Using a heat tool (if at all possible - it really does make a difference to the result) aim it at one area of the powdered image. The heat will affect the powder: it will change colour, become shiny or sparkly (depending on what powder you have used). As soon as one area has changed colour, move your heat gun to the next area and so on. This is called "chasing" the image. Don't wave the heat gun all over the card - all you are doing is heating the entire card and the image will take forever to emboss properly.
Cleanup
Never wash a rubber stamp under the tap. Either use a designated stamp cleaner, a stamp scrubbing pad (just run under the tap, and wiggle the dirty stamp over the fibres to clean - then dry on kitchen roll) or dampen a pad of kitchen roll and wipe over the stamp. Filthy and clogged stamps can be cleaned with an old toothbrush - dampened with water or stamp cleaner. Rinse off by wiping with damp kitchen roll, an old flannel or towel, then dry with kitchen roll
Alchol-free baby wipes are excellent for cleaning stamps, hands, and also to remove most inks from the top of the stamp (the wood block). Finish by blotting with kitchen roll.
F.A.Q.s
- Q: Why is my stamped image uneven - more inky in some places?
- A: Did you hold the stamp in your hand when inking it? This results in uneven application every time! Always place the stamp rubber-side upwards, flat on a hard surface and then ink up. The application will be even, and you can also check there are no missed areas.
- Q: Does size matter?
- A: Not in ink pads! Inking a stamp rubber-side up means you can use any size or shape of ink pad: Option Plates, Petal Points, Cats Eyes, mini Versacolour pads etc.
- Q: Can I use a hairdryer to emboss?
- A: No. A hairdryer is not hot enough to melt the embossing powder (pigments suspended in a polymer base) and will only blow the powder away.
- Q: Does the ink need to be the same colour as the embossing powder?
- A: No. The embossing powder is always the colour that you will see - so you could use pink pigment ink and gold embossing powder, and the result will be gold. Green pigment ink and black sparkle powder? The result will be black sparkle. If you want to emboss and also see the colour of the ink, then choose clear embossing powder as the colour will show through.
Trouble shooting
- Q: The image looks "greasy".
- A: This is because you heated it too long, and the powder has started to sink back into the card.
- Q: The image is "grainy" and feels rough; some grains have fallen off.
- A: You haven't heated the powder long enough.
- Q: There are "speckles" of excess powder on the card, not just on the image.
- A: Certain types of paper and card are very static (eg: vellums and glossy card) and you may notice little dots of embossing powder on the card. Wipe the card over with an Anti-static Pad or a used tumble dryer sheet before you start to eliminate the problem. Alternatively, use a dry fine paintbrush to dust away any excess.


+with+watermark.jpg)


1 comment:
Thanks for all the tips! I tried embossing yesterday for the first time and I think I've what you call a "grainy" image. Can you look at my card and see if I should've heated it a little longer?
Post a Comment