 The canvas is 6" x 12 " so you can see how big the letters are. I bought the whole
A ~ Z last year & use them as templates for my scrapbooking & home decor projecets. The canvas is painted in a matt vintage cream acrylic. When I was chatting with my fellow Su creative coach's earlier in the week we were talking about a new technique to make up glimmer mists using Su products................. & I can now tell you that it works really well.All you need are some re-inkers from Su in your chosen colours, Stampin' Up shimmer paints & some rubbing alchol or Isopropyl alcohol & a small mister bottle & finally a pipette. Getting the Isopropyl Alcohol was a tad trickier than I had reckoned on & eventually managed to track it down to an independant hardware store in the painting section.
- Using the pipette half fill the mister with the Isopropyl alcohol
- Add a couple of drops from the re~inker ( the more re~inker the deeper the colour )
- Then add the shimmer paint to make the small mister bottle 3/4 full
- Shake well before each use as the different products will separate
{ be careful as the mini sprays are only mini in size & they have the ability to spray a huge area, especially if you dont want them too }
I covered each of the letters with pages from an old book & when they were dry I inked the edges using the sponge daubers & close to Cocoa ink.
Once mounted I used some 3d paint in copper to accentuate the corners.
The other project that was started a couple of weeks ago is covering my latest American crafts scrapbook, I usually use material but its not that easy to cover them tidily with material & not having any glue show through, so I decided that I would now try using scrapbooking papers.
This is my "scrapbooking me" album so it had to reflect my style & personality a little.

- I used the vintage vailla matt acrylic to cover the raw edges of the chipboard & a little way in as it would then be a little more forgiving if I mis cut the papers as i'm prone to do.
- I used tombow glue to stick the scrapbook paper to the covers & one of the papers had fabric tape measures that I cut into strips to edge the album.
- When all of the covers inside & out were dry I coated them with diluted tombow PVA to seal them & protect them from ripping or staining.
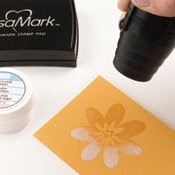
- You stamp your image onto plain or patterned paper & cut it too size
- Place the piece of paper into the melt pot & sprinkle with UTEE
- heat up the melting pot
- When all of the UTEE is melted carefully remove & place on the non stick craft sheet.
- Wait until it's completely cold & then soak in lukewarm water until all of the backing paper has disolved & you are left with a flexible semi translucent embellishment to use on your layout.
 The original embellishment was too thick so I reheated in the melt pot & the ink smudged slightly, a learning curve I think, but I'm impressed & will use it in a project I have in mind during the week.


+with+watermark.jpg)


1 comment:
What a fab idea!!! It looks great, I like the smudge effect. It matches your blog (the branch, not the smudges! lol)
Will deffo be trying this out :)
Post a Comment