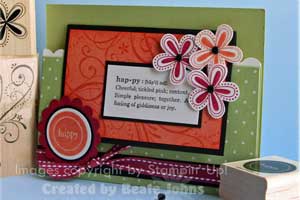
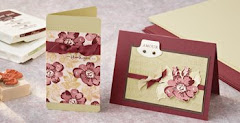
The final all day event for 2012

Here are the dates for 2012 Experience days that Sharon & myself have organised.

Now Booking

Saturday 1st December at Hethersett Village Hall for the last all day event of 2012 & a Christmas Card & gift event
Theme - A whole day crafting
Cost - £25

Future Dates:


Saturday 1st December ~ Christmas gift event

And don't forget for every event you attend you will receive a FREE raffle ticket which could win you a
BIG SHOT BUNDLE.

(Draw to take place during December's Event)

All DAYS HAVE VERY LIMITED PLACES SO BOOK NOW TO AVOID DISAPPOINTMENT. YOUR PLACE IS ONLY SECURED ONCE PAYMENT IS RECEIVED.


Do you fancy a catalogue party?

Did you know that you can qualify for hostess benefits without having to hold a party?

Just by showing your catalogue around to your family, friends or craft group, If you collect together orders totalling over £150 you will qualify for a free hostess benefits.

If your interested please contact me for further details.

Search This Blog

Contact me

Stampin' Up Contact details I have set these business hours to preserve my home / work life balance.

Email ~ Anytime ~ lovellsinnorfolk@hotmail.co.uk
Or call me between 9.30 Am ~ 8Pm ~ 07092984580


Tuesday, 29 July 2008

Masking the basics ~ Tutorial

Another wonderful tutorial By Beate covering the basics of masking.

Masking - Basic

by Beate Johns

Something as simple as a little Post-It® Note adds lots of depth to your stamping.

Supplies
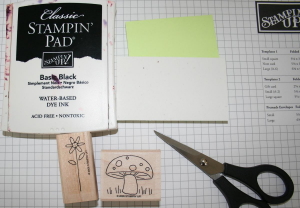
  • Post-It Note™

  • Scissors

  • Stamps

  • Cardstock

  • Ink

Step-by-Step

  1. Step 1

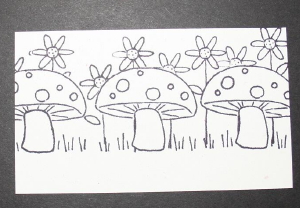
    Stamp the image you would like to have in the foreground (very front) of the scene on your cardstock.
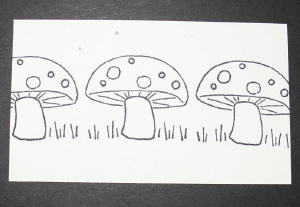
  2. Step 2

    Stamp the same image on a Post-It Note™, making sure that part of the image is on the sticky part of the paper.

    I stamped two images, since I have several mushrooms on my cardstock.
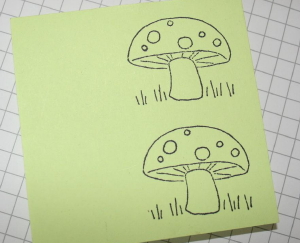
  3. Step 3

    Carefully cut the images on the Post-It Note™ out with your scissors.

    Cut right on the line or even slightly inside of it.
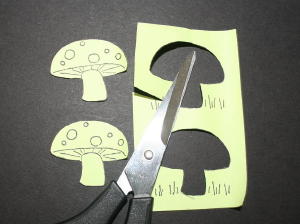
  4. Step 4

    Layer your Post-It Note™ images over those on your cardstock.
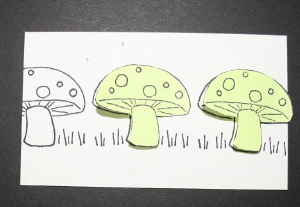
  5. Step 5

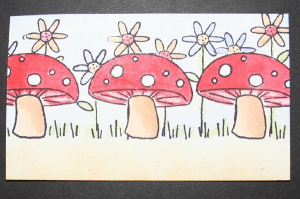
    Stamp your second image over your mask. This image will appear to be in the background.
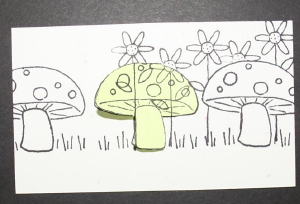
  6. Step 6 (Optional)

    Once you have finished stamping over one image, remove the mask, place it over the next foreground image and continue to stamp.
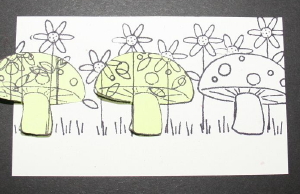
  7. Step 7

    Color your image if necessary.

  8. Step 8

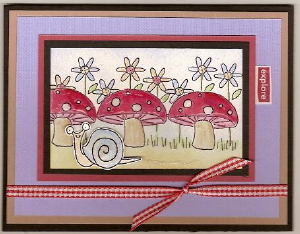
    Finish your card.


Gamasol Blending tutorial

In the store where I work one of the most frequent questions is about pencils & colouring mediums, when I found this tutorial I just had to add it here for reference. This is not my work, I have fully credited the writer of the tutorial.
its worth Noting that here in the UK the odourless mineral spirits may not be called gamasol, I know it is available from Winsor Newton as Odourless mineral spirits & the paper stumps are sometimes referred to as Totillions.

Gamsol Magic

by Cecilia Ross

Use colored pencils, odorless mineral spirits, and blending stumps to color a masterpiece.

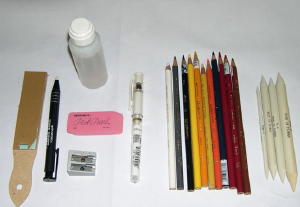
Supplies

  • Prismacolor™ Pencils or other wax-based colored pencils

  • Blending stumps in various sizes

  • Gamsol or other artist-grade odorless mineral spirits

  • Emery board or sanding block to sharpen stumps

  • Soft eraser

  • Metal pencil sharpener

  • Neutral colored cardstock

  • Outline stamp

  • Dye based ink


  • To purchase Prismacolor Pencils, Gamsol or blending stumps, check out the web store at Inky Antics. Be sure and tell them Splitcoast sent you!
    Check the bottom of the tutorial for lots of great technique and supply tips added since the tutorial was initially published.


Step-by-Step

  1. Step 1

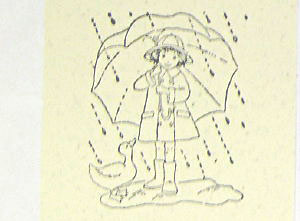
    Ink stamp with dye based ink and stamp image on neutral cardstock.

  2. Step 2

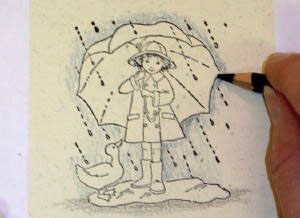
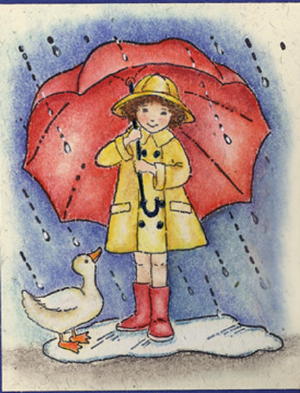
    Start coloring the image background (usually sky and ground) with a pencil, applying a light amount of color close to the edge of your image. I used Copenhagen Blue.

  3. Step 3

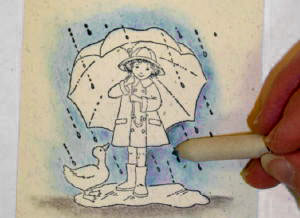
    Dampen the tip of your stump with Gamsol.

    Blend the color with the side of your stump, pulling the color towards the outer edges in a small circular motion.

    HINT: This works best if you have a small plastic bottle with a dauber lid (like a bingo marker) or a small piece of felt soaked in Gamsol. Press the stump against the felt or the dauber top to dampen.


  4. Step 4

    Continue coloring and blending the inside images as in Steps 3 and 4.

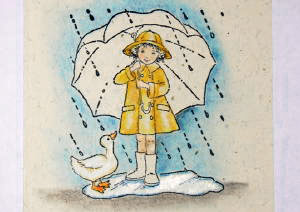
    Always start with the lighter colors first like the skin, goose and puddle.

  5. Step 5

    Once all of the base colors are in, go back and add some shading or highlights.

    To shade, add darker color around edges, in creases and anywhere a shadow would be.

    Highlights should be added with a lighter color or simply by removing color with an eraser.

  6. Step 6

    Now put the card together. There is no need to seal the image. Gamsol sets the colors so there's no worry about smudging.

Variations

Pencils
Your colored pencils must be waterproof. Water soluble pencils will not blend with mineral spirits. Usually the box will just say colored pencils and not have anything that refers to aqua or water (like Aquarelle).

Stampin' Up! Pure Color, Derwent Studio Line, and Faber-Castell (better quality, but pricier) pencils also work for this technique, but Prismacolor Pencils have more colors to choose from. You can always blend two or more colors together to get the shade that you want, it's just extra work.

Blending Stumps


Clean your stump often with an emery board or sanding block so that the tip of the stump is not holding too much color. Sharpen the tip for finer work. The emery board also serves to rough up the tip (if the tip gets shiny you'll notice it just squeaks on the paper and doesn't move the color around).

Monday, 28 July 2008

So excited

I am really excited..... I am having a Stampin up party this Friday.
Michelle is coming to demonstrate & it will be nice to see all the lovely products demonstrated as I have been buying the sets from America for ages so I have never been to a party.
Anyone in Norwich fancy popping in just drop me a line & anyone that has any tips for hosting a party I would be happy to hear them.


Pictures from the weekend


What a lovely weekend, the weather was very kind to us for a change, we made the most of the weather and went out to an open garden at Kirby Bedon near Norwich & then to Fairhaven water garden.


Just recently Abi has become interested in photography and always seems to have a camera in her hand, so I thought I would share with you some of her latest pictures.


Blurred vision Watercolouring ~ Tutorial

Another wonderful tutorial from Beate on splitcoast stampers

Blurred Vision Water colouring

by Beate Johns

Create a diffused water colour look on solid or outline images, super quick and super easy.

Supplies

  • Stamps

  • Cardstock

  • Dye Ink

  • Aqua Painter or watercolor brush

Step-by-Step

  1. Step 1

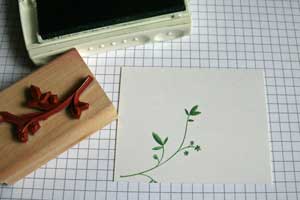
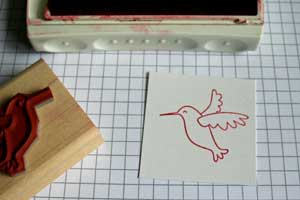
    Stamp an image in dye ink.

  2. Step 2

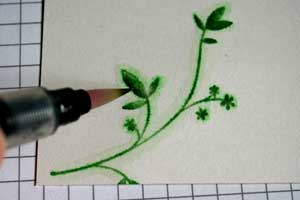
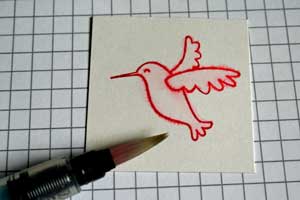
    Go over the stamped image with an Aqua Painter or watercolor brush. The ink will run a bit to give a water coloured look.

  3. Step 3

    Repeat Step 1 and 2 if you want more than one image.

    Only stamp and blur one image at a time. The image will blur better if you go over it right after stamping.

  4. Step 4

    This technique works for solid and outline images alike.

  5. Step 5

    When blurring outline images, try pulling the ink from the stamped lines to the inside of the image to color it in.

  6. Step 6

    Finish your card.


Thursday, 24 July 2008

I am so excited


I am so excited my friend Amanda has been chosen to become a designer for Spiral Whisper she is amazingly talented and now you will all be able to share her wonderful fairy designs.
After seeing a post on someone's blog wanting designers I persuaded Amanda to send off some of her designs, I am so pleased that she did.
Amanda has just started a blog so watch this space for some of her work.


Explosion card & triangular tri fold~ Tutorial

These explosion cards seem to be very popular at the moment so I thought I would add this post for reference and for anybody who hasn't seen one yet.
Dawn also has a video for the Triangular Tri fold card.

Dawn has some amazing video tutorials on her site, a very talented lady.


Joy Fold card ~ Tutorial

Another tutorial that I want to try, this time by Beate Johns

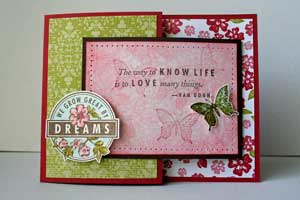
Joy Fold Card

by Beate Johns

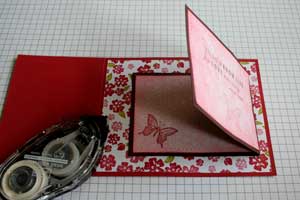
Create this unique opening card with two pieces of cardstock.

Supplies

  • One 4 1/4" x 8 1/2" piece of cardstock

  • One 3" x 8" piece of cardstock

  • Two 2 3/4" x 4" pieces of cardstock or designer paper (optional)

  • One 4" x 5 1/4" piece of of cardstock or designer paper (optional)

  • One 2 3/4" x 4" piece of cardstock or designer paper (optional)

  • Additional cardstock

  • Scoring tool

  • Adhesive

  • Stamps

  • Ink

Step-by-Step

  1. Step 1

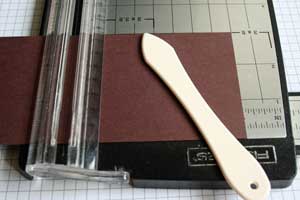
    Score your 4 1/4" x 8 1/2" piece of cardstock at 5 1/2".

  2. Step 2

    Score your 3" x 8" piece of cardstock at 4".

  3. Step 3

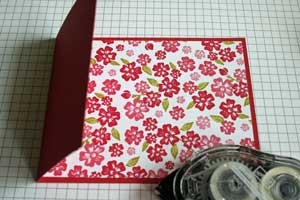
    Adhere your 4" x 5 1/4" piece of designer paper on the inside of the card.

  4. Step 4

    Adhere your 2 3/4" x 4" piece of designer paper to the card front.

  5. Step 5

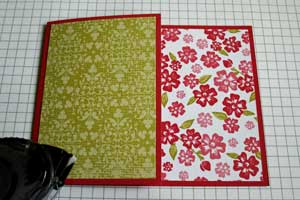
    Stamp your 2 3/4" x 4" pieces of designer paper if needed and adhere them to the inside and outside of your smaller folded cardstock piece.

  6. Step 6

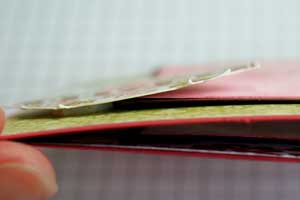
    Add adhesive to the back of your smaller flap and tape it to the inside of the card. Make sure the fold of the smaller flap is pointing to the right.

  7. Step 7 (Optional)

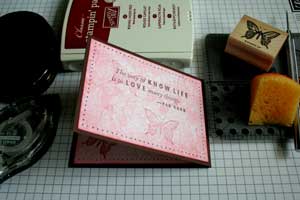
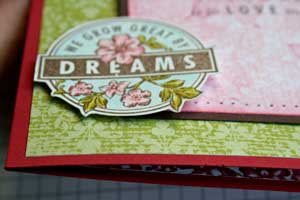
    If you want to secure the flap from opening, stamp a complimentary image and adhere it with dimensionals to slightly over the edge of the smaller flap to keep it closed.

  8. Step 8

    Finish your card.

Variations

  1. Open it on top
    Make your card base a 5 1/2" x 7 1/4" piece of cardstock and score it at 4 1/4".
    Create your flap from a 4 1/4" x 5 1/2" piece of cardstock and score it at 2 3/4".
    Try different sizes


Related Posts Widget for Blogs by LinkWithin

Stampin' Techniques

Stampin' Techniques
Two step Stampin

Watercolouring

Masking

Markers

Rock n roll

Stampin' Pastels

Heat embossing

Crafts are here

Crafts are here, crafts are there,

My craft supplies are everywhere.

I really should clean this mess,

but I like it I confess.

Floor is littered, chairs are piled,

Kitchen's looking pretty wild.

On the table, counter too,

Seems that any place will do.

Hall is stacked with cartons high,

filled with things folks like to buy.

Garage is full, but so far....

there's still room to park the car.

I never have an idle day,

New ideas come my way.

Don't know yet what I'll create,

but my imagination's great.

My family smiles, they don't complain,

although at times I am a pain.

but when all is said and done,

I really am a crafty one!

I"ve been visited

link to free hit counter html code
Visit the hit counters gallery.

Guest book

NeoCounter