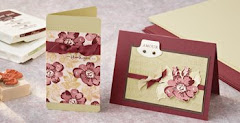
Decoupage is a popular craft, which can be used to create many beautiful projects.
The word originates from the French 'Decouper' - to cut out. Decoupage work can be flat, for example cutting and pasting images to decorate scrapbooks or flat surfaces such as a tray, wooden box etc or 3D effect.
3D decoupage
3D effect decoupage involves cutting out several copies of the same image, and layering them to produce a 3D effect, using either tiny double sided adhesive foam pads, glue dots or silicone glue to stick the layers in place. Each successive layer is smaller than the one before it. Foam pads and glue dots are very easy to use, particularly for beginners, whilst silicone glue can give a more natural effect to your project.
If you are a beginner, it is probably best to start with 'step by step' decoupage. This means that each layer of the design is printed separately with only the detail needed for each individual layer, making it easy for you to cut out and assemble your project.
You start with the largest design as the base for your project, and then add the next largest layer and so on until you have assembled the complete project. It is usually very straightforward to identify the order of the layers, but if you are a complete beginner, you may prefer to start with a sheet where each individual layer is numbered, so it is absolutely clear in what order they should be assembled.
Projects can also be created from several identical images - this requires a little more experience, as you will need to judge how many layers are required and which elements of the image to remove from each successive layer.
Finishing touches
You can achieve a more rounded and natural effect for, for example petals, by curling the edges of the top layer (using a shaping tool, the back of your scissors or your fingers) before assembling your project. You may also like to varnish the finished project. Some papers already have a glossy finish.
Tools


+with+watermark.jpg)


No comments:
Post a Comment